3rdcoaster
Member
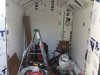
I think your going to appreciate the 2 x 4 reinforcment in the shed down thd road.
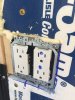
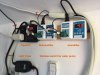
Are you putting a GFCI on the power in the shed, either as a breaker at the panel or receptacle? or is the one you put on the house protecting the shed on the load side?
Are you giving yourself enough room at your receptacles for timers and your other loads?
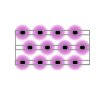
Looks like your going to have a nice space there. Cant wait to see some green in it.
Are you putting a GFCI on the power in the shed, either as a breaker at the panel or receptacle? or is the one you put on the house protecting the shed on the load side?
Are you giving yourself enough room at your receptacles for timers and your other loads?
Looks like your going to have a nice space there. Cant wait to see some green in it.