DIY COB: what do you use to build your frames?

Traplife

Well-Known Member
What do you DIY COBers guys use to mount cpu heat sinks to a frame? a wooden frame? metal frame? is using a metal frame sketch due to the chance to short a circuit? im looking to build a setup to cover a 2x3 area and i know what to buy chip, driver, and cooling wise, im just not sure how to assemble this all together on a suspended unit.
 

alesh

Well-Known Member
What do you DIY COBers guys use to mount cpu heat sinks to a frame? a wooden frame? metal frame? is using a metal frame sketch due to the chance to short a circuit? im looking to build a setup to cover a 2x3 area and i know what to buy chip, driver, and cooling wise, im just not sure how to assemble this all together on a suspended unit.
I'm quite happy with aluminum angles.
Aluminum Angle with Holes.jpg
 

thetr33man

Well-Known Member
Im actually kinda confused about why people dont use wood, especially for the individual heatsinks that are becoming popular. Would be very easy to cut holes in plywood and use a router to put an edge on them for the heatsinks/cobs to sit on. Also you could drill a bunch of extra holes and move individual cobs around to focus light where you want, etc. Maybe wood is more of a fire risk, but seems like a very easy to use/versatile material for many people, also cheap.
 

bicit

Well-Known Member
For those that want to get fancy.

https://8020.net/
I actually want to build an entire grow room out of that stuff....

Im actually kinda confused about why people dont use wood, especially for the individual heatsinks that are becoming popular. Would be very easy to cut holes in plywood and use a router to put an edge on them for the heatsinks/cobs to sit on. Also you could drill a bunch of extra holes and move individual cobs around to focus light where you want, etc. Maybe wood is more of a fire risk, but seems like a very easy to use/versatile material for many people, also cheap.
Aluminum is almost as easy as working with wood. You can cut aluminum angle on a miter saw with the right blade. Drilling and tapping aluminum is a simple operation with many of the same tools. Wood just isn't as sexy without a bunch of extra work finishing it :P
 

VegasWinner

Well-Known Member
aluminum channels 3/4X3/4" x3/4"x 2 or 3 , rectangle allows for a lip, a channel, and corner connections, lightweight and easier to drill than wood, with any descent drill bit and 18v drill. create a square and a couple of rails in between and you have a grid to mount your HS to. good luck. peace.
 
Aluminium angle or channel is your best bet for a lighting fixture. It just has so many advantages over other materials(strength, weight, thermal conductivity, etc). However many materials would do fine for housing.

Just really depends on your design and financial means as to what materials you could use.

Personally I've used aluminum channel. A break and some high gauge sheet metal would be another substantially awesome idea.
 

NapalmZen

Well-Known Member
https://www.rollitup.org/t/my-new-diy-grow-light.931434/

aluminum angle.

^^pics are in my thread above.^^ if you look carefully, you will see that it is grounded. using aluminum makes fixing mistakes easy as well. i put one of the cob assemblies in the wrong place and had to open the holes with a dremel to mount them in the correct place. it doesn't look the best, but it's cheap as shit and does the job.

and yes, i drilled strait through the fins with a 1/8th drill bit and then screwed the assemblies together.
 

Mellodrama

Well-Known Member
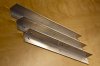
I bought a Timber Kit. I was inclined to use wood just because I'm more familiar with it and have more tools. Ended up buying 1" X 1" X 1/8" aluminum rail at the local metal shop. Used a Porta-A-Band to cut the rail, then a few clamps and a drill press to drill holes for screws. With clamps and a carpenter's square I could drill the corners so they fit together snugly and at the correct angle.

I'm glad I went with metal instead of wood. If I had used wood, it would have been something like 1" X 2". Definitely wouldn't have used plywood, because plywood blocks airflow.

Timber's pin sinks came with four extra screws, placed in the four holes that are on the pin sink faces. I took those screws out, slipped 1/8" X 1" fender washers (100 count boxes at HD) under them, then re-installed. If you place your rails correctly (for me it was 2 7/8" apart) the fender washers will clamp down onto the aluminum rails when the screws are tightened a little bit. Even if you leave the screws somewhat loose, there's no way the sinks will fall off the rails. It's very handy to move the COB's back & forth along the rails.
 
Top