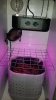
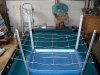
Some years back I wanted to try a DWC ScroG with the RubberMaid tubs I like to use for that and finally came up with this and it works great tho I'm going for bigger screens with future ones. Had some aluminum flat bars I cut in half to be support legs. Drilled holes in the bars at the height of the tub and in the corners of the tubs then used nails bent to hook through the holes in the tubs to keep the bars up with duct tape on the bottom corners to keep the legs from moving. The tub sits on a wheeled dollie so the whole thing is a unit and the screen hangs on bailing wire so it can be easily moved up as the plant keeps growing in height and pushes up the screen.
View attachment 3983035
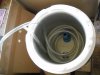
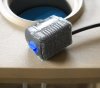
A pic of one set up without the screen and using my DIY chiller to keep the nute temps at 65F.
View attachment 3983051
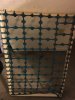
I put a vertical screen up in the corner of the grow room to round out the corner. Used sheep fencing like with the above screen then used some heavier screen cut to hook into the vertical screen with light chains from the ceiling to hold up the front of it.
View attachment 3983065
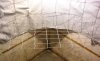
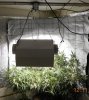
That horizontal screen is 5' wide so I rigged up a bracket to mount a 2nd 400W HPS light in that hood, piece of chain to tilt it back to aim all the light at the canopy and hung it from my light rail to move it back and forth over the plants.
View attachment 3983067
A heavy frame isn't really needed and can be harder to work with but if neatness is your goal them I'm the wrong guy to talk to.
")