Doc's Organic Tangie Grow

DocFuego

Well-Known Member
Welcome everyone. I have decided to start a journal here for our grow of Tangie from Crockett Family Farms.
Hopefully this journal helps someone in the future as well as help me with archiving notes.

Due to our plant counts here in Colorado, we will be splitting this grow up between two different locations. I will be documenting things on my end, and throwing up pics and info on the others here and there for good measure as they materialize.
My hope is to find a stud male, and of course that superstar Mom.
I will be popping 6 seeds here, and GD will be popping the other 6 at his location. Any males found from GD's lot of seeds will be moved to the man cave along with mine.
So let's get into it shall we?


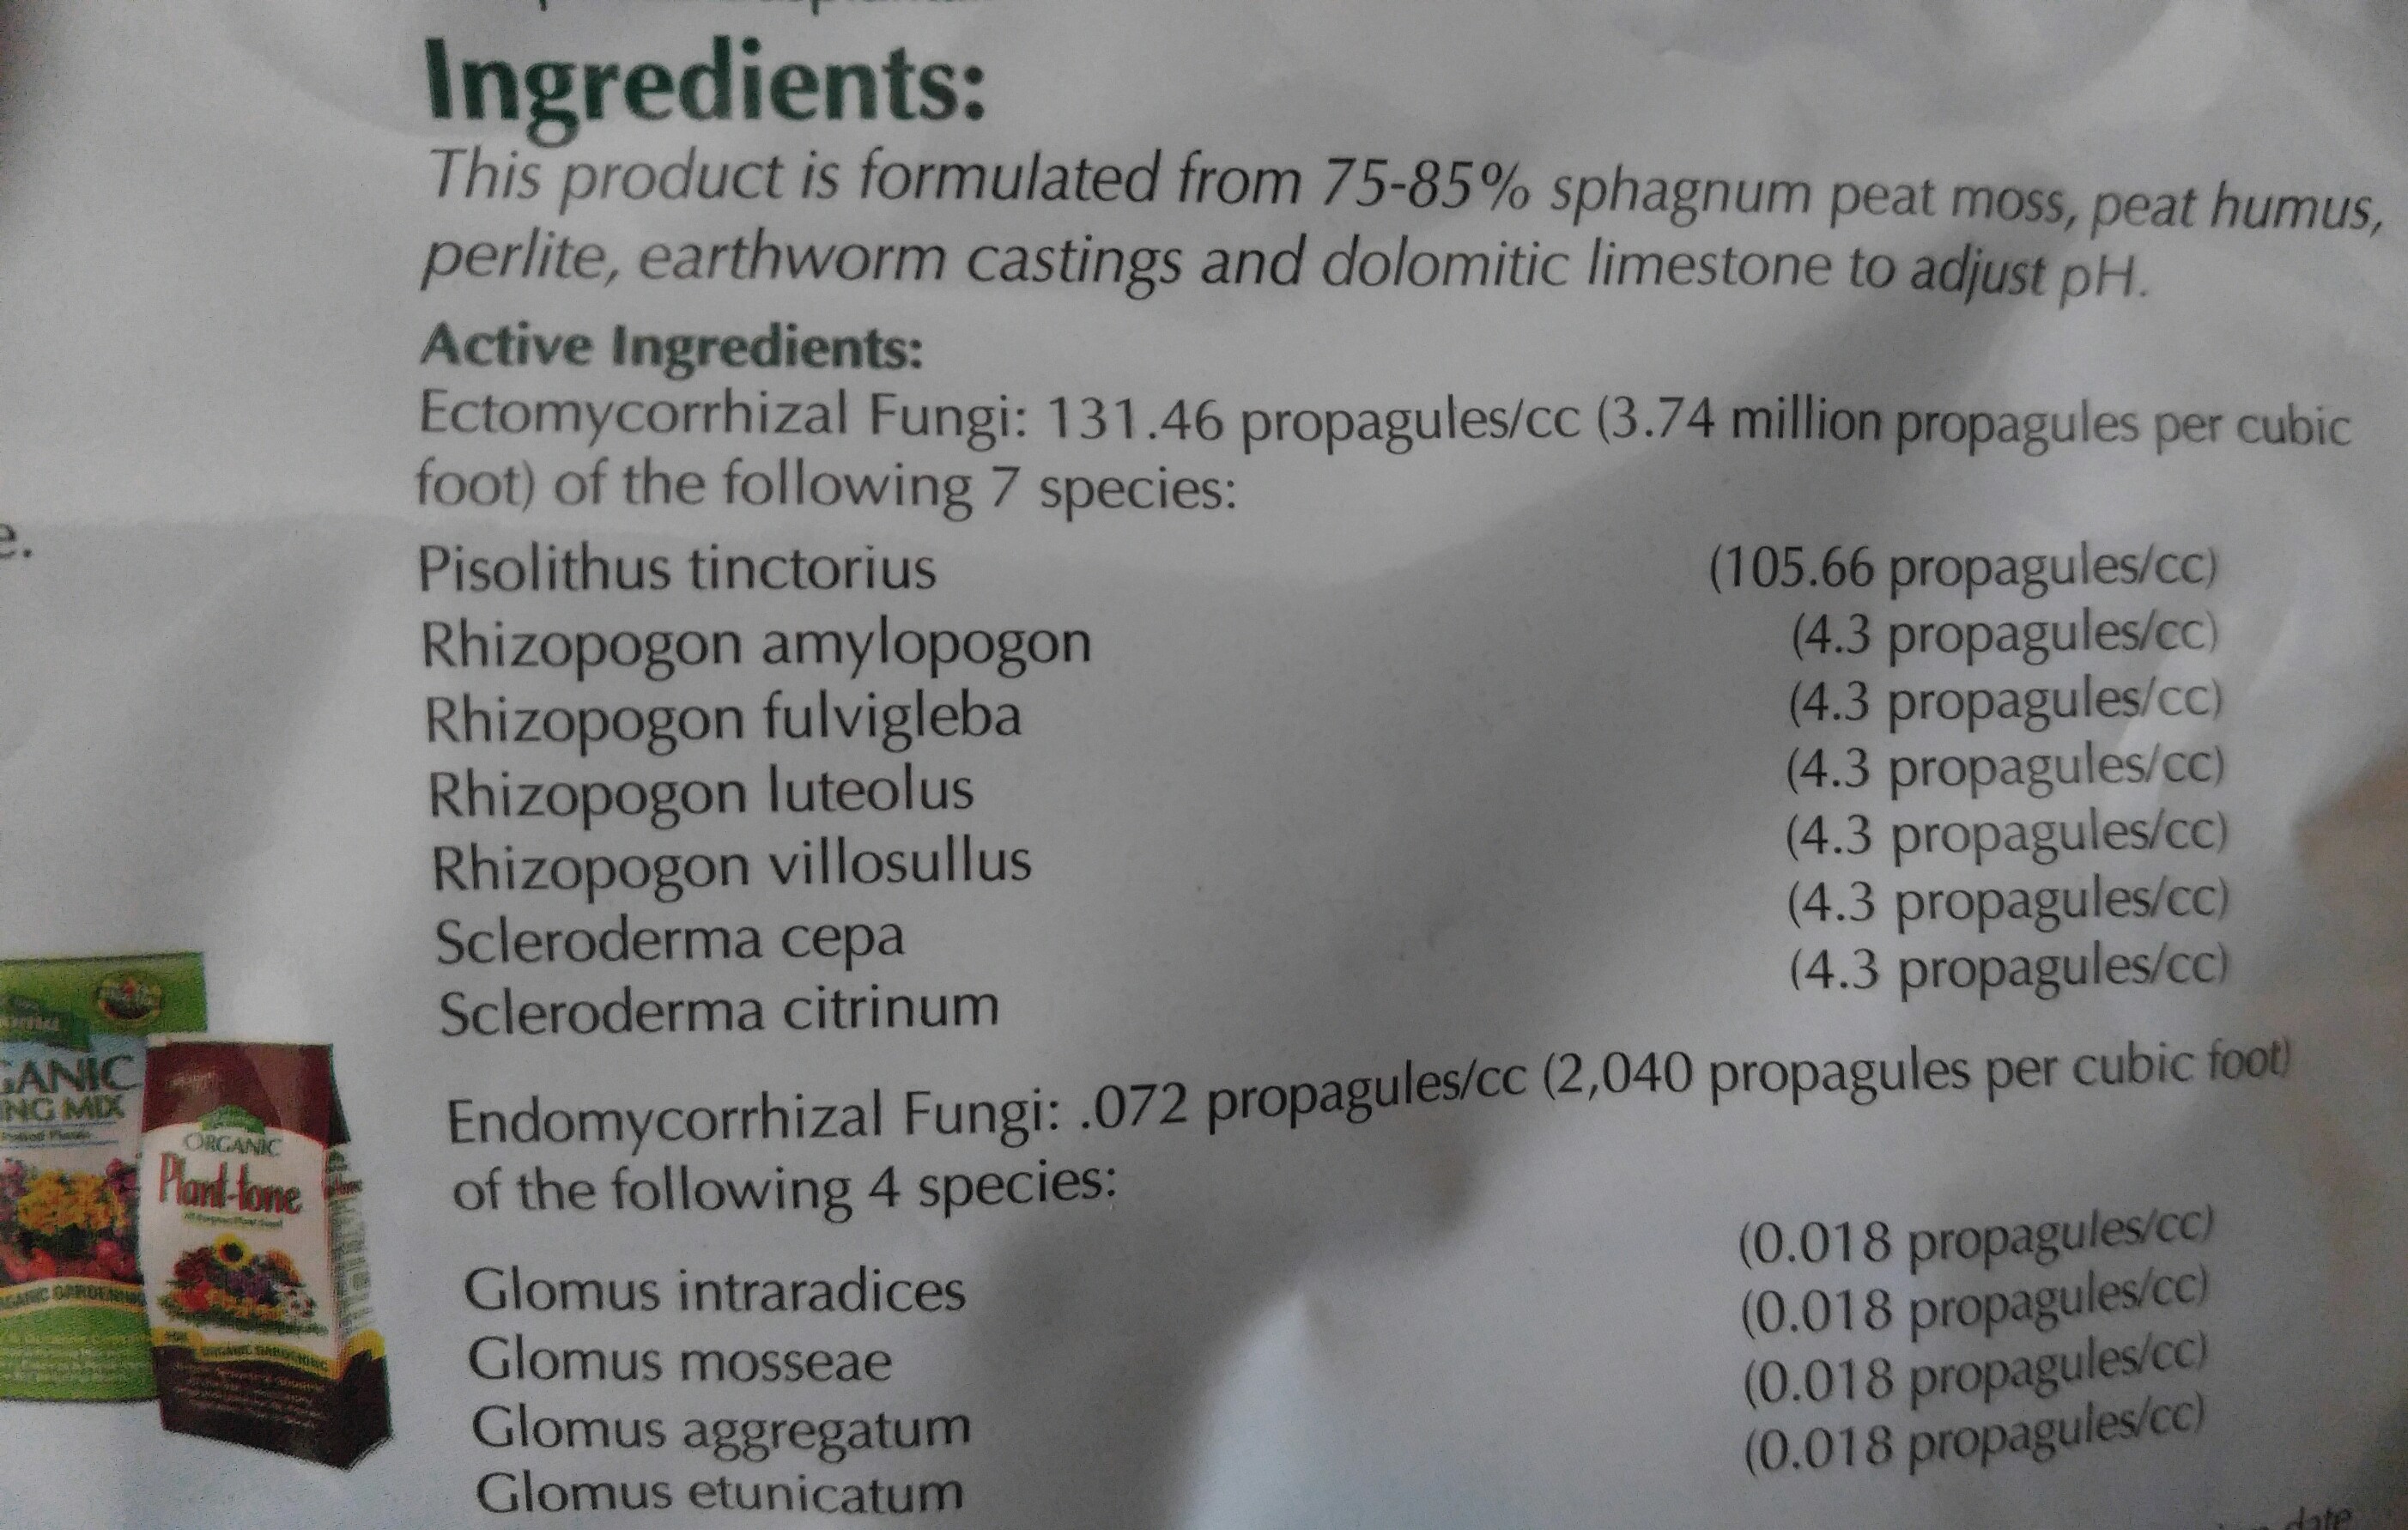
I started the seeds in Epsoma Organic Seed Starter Mix.
I really like this stuff for starting my seeds.
It is a mix consisting of peat moss, humus, perlite, ewc, & dolomitic limestone, as well as both ecto and endo mychorrizae to inoculate the root zone as soon as it begins to form.


Here are the seeds we will be starting with. Again these are Tangie from Crockett Family Farms. These seeds were acquired from Crockett himself when he was in Denver for the Cannabis Cup in 2015.


Knowing that these seeds were only 2 yrs old, and were properly stored, we elected to sow these seeds as I do any fresh seeds that I produce.
I do not soak my seeds in water, or germinate in a paper towel. I use Mother Nature's method and sow them directly into my starting mix 1/4 - 1/2" deep that has been moistened by spraying a mixture of water and aloe through a pump sprayer or spray bottle until the mix reaches "Field Capacity".
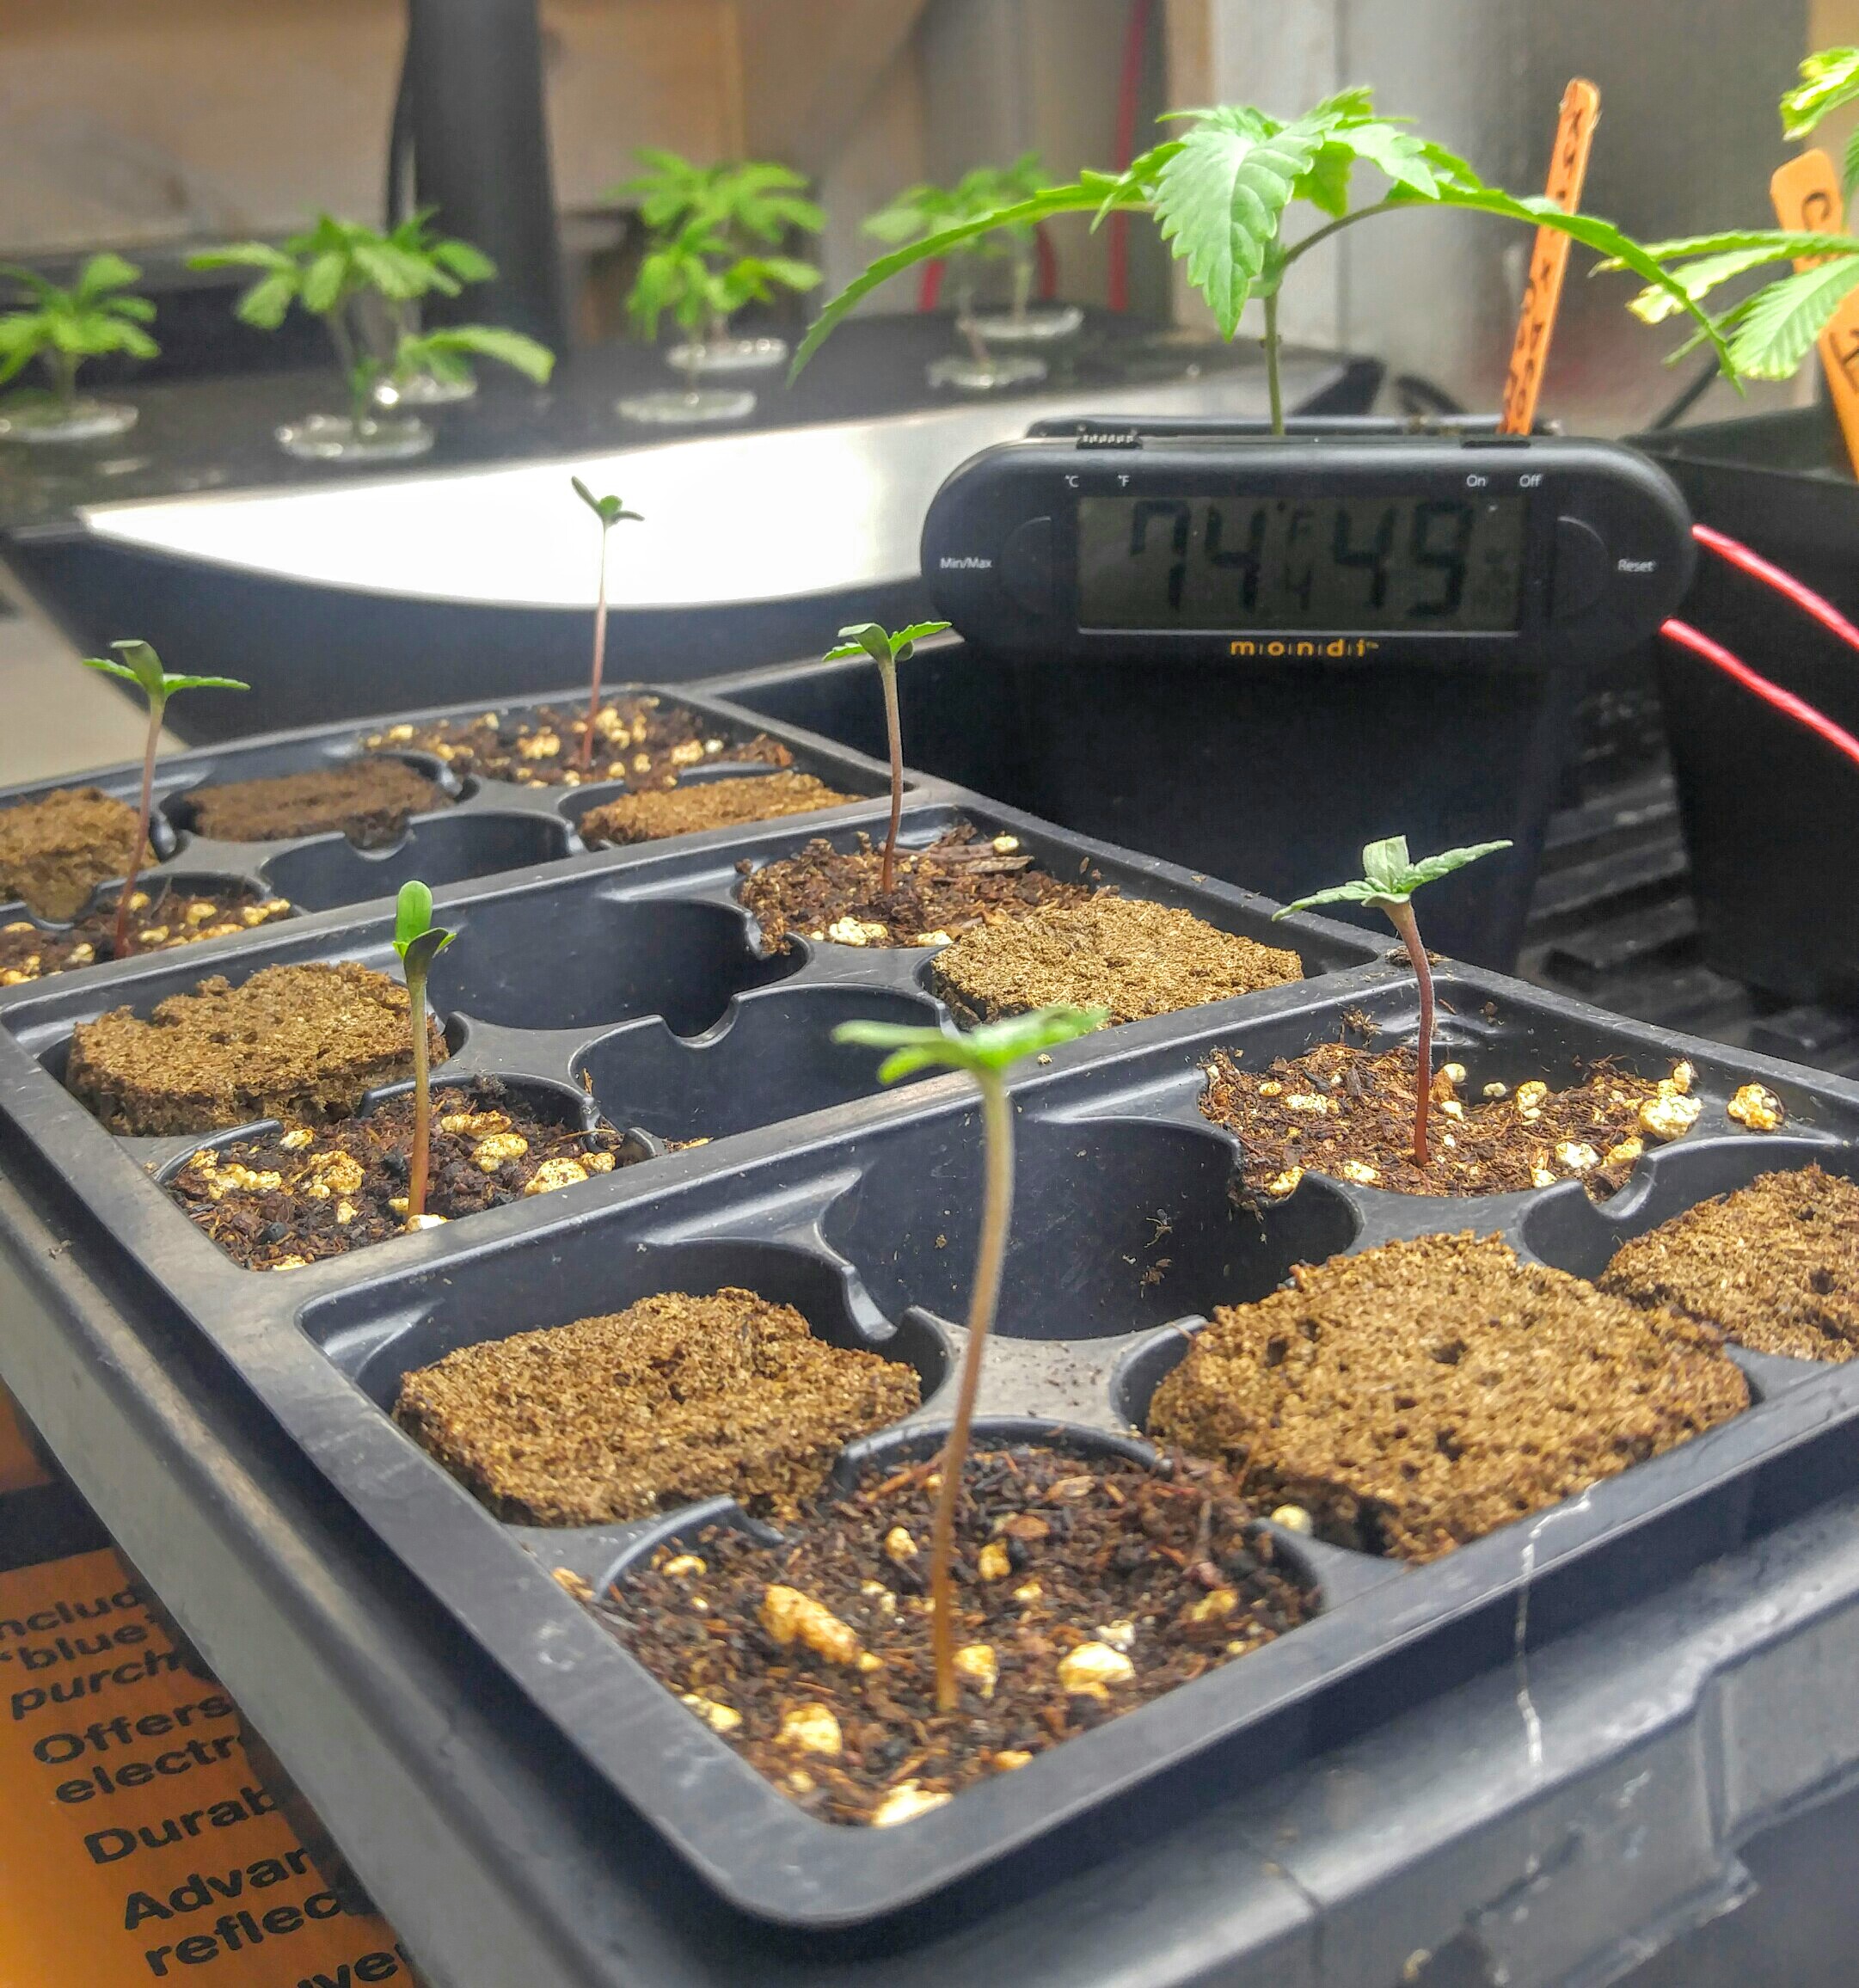
The seeds are then sown in this mix in seedling trays, which are placed under 2ft, 4 bulb T5 lamps at a temp of 73 degrees farenheit and a RH of 50%.


The seeds were sown at 7pm on 1/24/17.

***Update 1/29/17***

4 of the 6 have emerged and broken ground. The other 2 have just barely started raising the soil, and should be up tomorrow.


I will continue to update this original post along the way, as we search for the holy grail of the Tangie.
 

thenotsoesoteric

Well-Known Member
Hey best of luck to you and I hope you find a nice couple plants. That being said... if you're looking for the holy grail you're going to have to pop a few more beans. :fire:
 

raytizzle

Well-Known Member
Awesome start! I wanted to grow some tangie strains as well and I was looking at Citrus Sap, so, my question is, why tangie and not citrus sap?
 

DocFuego

Well-Known Member
I guess it just comes down to preference. From what I understand, is the sap loses its Tangie smell. It takes on a mandarin orange and hash aroma.
Now on the other hand, the Tangie is not a devastating smoke what so ever.
Crossing it with the GG probably added a well needed punch.
 

raytizzle

Well-Known Member
I guess it just comes down to preference. From what I understand, is the sap loses its Tangie smell. It takes on a mandarin orange and hash aroma.
Now on the other hand, the Tangie is not a devastating smoke what so ever.
Crossing it with the GG probably added a well needed punch.
Thanks for explaining that! I really love a good punch but I also love that tangie smell and taste so now I'm really lost in which to pick :( maybe I should just run both! haha
I'm excited to see you kill this grow journal! Are you going to be growing in Living Organic Soil?
 

DocFuego

Well-Known Member
*** Update 1/31/17 ***

All 6 Tangie beans have broken ground and are reaching for the lights.
The last one was having trouble shedding her membrane, but after a day of misting, she muscled through it and is searching for the light.


DocFuego

Well-Known Member
Thanks for explaining that! I really love a good punch but I also love that tangie smell and taste so now I'm really lost in which to pick :( maybe I should just run both! haha
I'm excited to see you kill this grow journal! Are you going to be growing in Living Organic Soil?
Yes I will be using living organic soil.

My next update will include my soil recipe.
I will be recycling soil from our last harvest and will be re amending it as well as re innoculating it, and in the seedlings go.

Here are a few of the things we use in the garden.


DocFuego

Well-Known Member
Ok, so we have reached the point where the hard work begins and things start to get interesting.

We are going to get our soil ready so that these Tangie seedlings have a comfortable home once they are ready to be transplanted.

For this grow, we will be recycling our soil mix from our last harvest, but for the sake of information, let's pretend we are making this mix from scratch.

So let's start with our mineral mix. Any soil mix you make is going to need minerals in the mix to keep things balanced and your ladies as happy as possible. I usually make a decent sized batch of this mineral mix so that I have it on hand anytime I am mixing soil or re amending it. It is just easier to do more at once.
So the mineral mix I use is pretty simple.
You can make as big or as little a batch as you like at the time.

  • 2 parts Oyster Shell Flour
  • 2 parts Gypsum
  • 2 parts Azomite Granules
  • 1 parts Glacial Rock Dust
Once you have your mineral mix together, it's time to start mixing our base.

I always mix a large enough batch to go start to finish for 6 plants. For this volume, you will need the following ingredients:

  • 2 CuFt Sphagnum Peat Moss
  • 1 CuFt Pumice
  • 1 CuFt Lava Rock
  • 1 CuFt Biochar (thick pieces)
  • 1 CuFt Rice Hulls
  • 2 CuFt Humus (*Composed of 1/3 Compost such as Malibu Compost) and 2/3 EWC.
  • If you have them on hand throw in a few handfuls some probiotic herbs – comfrey, nettle, dandelion, etc.
  • Now, Mix this well. We want our aeration components distributed somewhat evenly.
You will end up with something that somewhat that looks like this.


Ok, now that we have our base, we can now start putting together our amendment mix.

The following amendments are what I use for my mix. You can add amendments or omit them as you find suitable. However for a beginner or someone just switching to organics, stick with a proven recipe. This mix can take you from veg to finish with nothing but plain water should you want to.

These ratios are *PER CU FT OF BASE*
Adjust your amounts as necessary.

  • Amendments:
  • 1/2 cup Organic Neem meal
  • 1/2 cup Organic Kelp meal
  • 1/2 cup Organic Crustacean meal
  • 1/2 cup Organic insect frass
  • 1/3 cup Gro-Kashi
  • 1/3 cup Karanja Meal
  • 1/4 cup of fish bone meal
I use an old cooking pot to mix these all together. You can toss them right in your base if you prefer seeing as it is all getting mixed anyhow.

Now that we have our amendments mixed, add 3 cups per cu ft of soil of the mineral mix you made earlier and mix that well.

You will end up with a big pot of goodness.


We are almost there. Now that we have our base ready, and our amendments all mixed up, it's time to mix that all up very well. I suggest taking a few minutes here to smoke a hooter, do a couple dabs, or whatever your thing is.

bongsmiliebongsmiliebongsmiliebongsmiliebongsmiliebongsmiliebongsmiliebongsmiliebongsmiliebongsmilie


Now that you got your buzz on, add your amendments to your base.


Now get to mixin' son!!!!! I just get right in and use my arms and hands. I get alot better control over the mixing this way, and besides, I like playing in the dirt.

I cannot emphasize how important it is to make sure this is all mixed extremely well.
If you think you are done, mix again for 10 minutes or so. Done now? Nope, do it one more time.
Now your soil mix is complete.

Microbes anyone?
I innoculate my mix right off the back using a product called Recharge. Recharge gives you all of the following in one convienient package:
Mycorrhizae, trichoderma, bacillus, molasses, humic, fulvic, and amino acids.


To do this I mix the recharge at the suggested rate, and add 10ml of aloe water per gallon. Make at least 4-5 gallons. You will need it.

I use a pump sprayer to spray the mix down and get it nice and hydrated.


I tend to spray a gallon, mix, spray a gallon, mix & repeat until your mix is evenly hydrated. You want to bring your mix to what I call "Field Capacity". Yes, I dabbled in mycology for a while.

Once evenly moist, you are done!!!!!!
You just made BLACK GOLD!!!!!!


So now you can close this puppy up and let the micro life get a start.
10 days covered and your soil is ready to plant in.
I plant directly into this mix, but I am going to tell you to let it cook for 10 days to be safe.

Now pat yourself on the back, take another smoke break, and start getting ready for transplant time.

Well, thats all for now.

#GrowersLove
 
Top