You are right - when I said "advertising"
I was thinking more in promotion of DIY watercooled led light as an option,
for the many people here on RIU, who want to diy with this new (or conventional) concepts.
It is much easier to make a decison towards watercooled led,
if they have good, organized support for this still unknown area.
As an "official" producer of watercooled light with reg. trademark and brand
I know it does not make any sense for me to patent or certificate such a product.
I can legally sell it as a kit for people unable to diy (drill, cut, seal,...) but a screwdriver and
soldering iron is always needed as a min.
As an artist - I see the real profit in reproduction of this watercooled concept in many different ways, by private end users. -
That`s an easy way to introduce watercooled light-heat-cogeneration
slowly to society and culture.
Not only cannabis growers can use this concept.
Specially in private, smart (pasiv)- houses - in correct dimensions -
a simple combination of watercooled light and PV panel can be a cheap, independent and ecological way, to cover all your basic needs. (electricity, hot water + heating, ganja + other healthy vegetables, e-mobility, +++ a clean and cool planet )))))


Experts say: average of ~ 25% of global electricity is consumed by lighting.
If now watercooled light could generate 60% of this giga-amount as heat power,
it could substitute oil and gas heaters as heat source.
The savings in CO² production and fosile energy could be enormeous.

But the professional lighting industry (phillips, osram,.......) doesn`t screen "watercooled".
So I estimate there are only a few dozens of experienced "watercoolers" in this world.
I see it like that:
We are a (relatively) small, new species of lighting engineers and avantgard artists, - but we can change the world
while making "fucky fucky" , and good concepts - fertilizeing like honey bees.
My starting idea would be:
to give more structure and order to the information that "watercoolers" are able to give.

you could always " search " watercooled in above function of this page, but it is a nice idea to collect all this information a bit more concentrated.
We could structure subjects like : i. e.
1. - electric safety
2. - efficacy
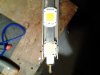
3. - lamp build
4. - different materials
"
". -
55. - fixing led chip on heat sink.
56. - final design and grow room.
I will mark my future post with important information about watercooled led light with:

So many advantage in "watercooled led light" - that this is only a recommendation.