Using a poly stock tank for worm bin?

Turpman

Well-Known Member
Few observations.
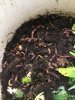
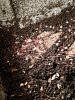
Red wrigglers don’t like to be soggy. So if you need to drain your bins you have them too wet. Too wet also means anarobic=stink.
You can control the wetness by what you feed.
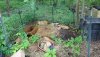
Your not going to have enough kitchen scraps to feed that many, maybe you have a big fam.
I think most industrial worm farms feed dry chicken feed.
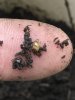
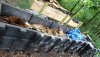
Bugs your going to get nats and stuff if you have the container open.
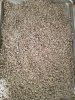
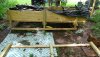
I run 25 gal containers. Keep covered with a sheet so they have good air circulation but no bugs can get in. I feed mostly kitchen waste but like said if you feed a-lot of wet stuff it will get too wet. Keep them warm 25ish they will be more active=more poo. I use peat as a bedding.
 

waterproof808

Well-Known Member
Also, feeding only kitchen scraps does not make quality EWC. You should feed your worms the same dry amendments you would mix in soil and let them cold process it without generating heat to preserve beneficial compounds.
 

rkmcdon

Well-Known Member
Thank you both!

Also, feeding only kitchen scraps does not make quality EWC. You should feed your worms the same dry amendments you would mix in soil and let them cold process it without generating heat to preserve beneficial compounds.
So kitchen compost, dried leaves, grass clippings and plants (stalks and leaves ran through a chipper) will not be sufficient? Feeding soil amendments seems expensive, but if that's what's best, I can do it
I think most industrial worm farms feed dry chicken feed.
Chicken feed? That's pretty cheap and easy to come by around here (I have to drive 400 miles round trip to get my soil amendments). That might not be a bad option
 

BluntMoniker

Well-Known Member
Don't order from UJ!! Sooo many better quality, quantity and price places. Also UJ is known to sell "red wigglers" and send a mix bag of various species.
What are the other places? Ive not heard many bad things about UJ, but if i ever need to order more worms, ill test out another site and see how they fair vs UJ.

UJ shipping was fast though, worms arrived alive, and they were all red-ish.. so id HOPE i got what i ordered, but im not an entomologist so who knows :D
 

waterproof808

Well-Known Member
Thank you both!

So kitchen compost, dried leaves, grass clippings and plants (stalks and leaves ran through a chipper) will not be sufficient? Feeding soil amendments seems expensive, but if that's what's best, I can do it
You can use kitchen scraps to make a decent EWC but if you want the highest quality castings you have to feed the worms quality ingredients. Most soil amendments are not that expensive IMO and if they are already in your castings you dont need to add them to your soil mix. My local farm supply will break the 25-50lb bags of amendments into 5 or 10 lbs for less than $10. Kelp and Neem meal are usually the most expensive.
You should also consider making leaf mould to use as a bedding. Your worms will love it.
 

rkmcdon

Well-Known Member
You can use kitchen scraps to make a decent EWC but if you want the highest quality castings you have to feed the worms quality ingredients. Most soil amendments are not that expensive IMO and if they are already in your castings you dont need to add them to your soil mix. My local farm supply will break the 25-50lb bags of amendments into 5 or 10 lbs for less than $10. Kelp and Neem meal are usually the most expensive.
You should also consider making leaf mould to use as a bedding. Your worms will love it.
Do you have an opinion on dry chicken feed vs soil amendments? I haven't heard of making leaf mold. I'll have to look into that. Thanks for the input!
 

BluntMoniker

Well-Known Member
Do you have an opinion on dry chicken feed vs soil amendments? I haven't heard of making leaf mold. I'll have to look into that. Thanks for the input!
Super easy. Gather up some dry leaves, crunch em up s bit into a dark bag, add some water to moisten them up, tie bag, poke some holes in the bag, and put them in a shady area for a year or 2.

Not sure if theres a quicker method of achieving the level of decay you want, but if you have your own property, it's almost effortless to make a leaf mould, and it's a great soil conditioner/compost additive
 

Turpman

Well-Known Member
Running a non draining container does work. I have never drained. I have had red wigglers for 20ish years. You just have to be on top of the moistness of your worm bedding. There is no need to keep the bedding so wet it is dripping. Your not after the runoff your after the castings.
I do live in Canada where it tends to be drier air wise than some places. Maybe that’s why I have success. Running a very large container is going to have a learning curve. A wide and shallow container will have more area for evaporation then a deep narrow so you will get away with feeding moist food. Most worm farms run shallow. Like 4” they feed the dry feed to the surface and mist with water. Hey also enoculate the surface with bennificial bacteria-microbes. I’m not sure what they use but that is what you want out of the worm castings. It’s more the live beneficials then nutrients. However the castings does have nutes. Just depends what you are feeding. I feed a mix of kitchen waste and chicken feed. Get the crumble. Do some research on the net there’s a plethora of info on worm farming. Keep us posted on your suscess-failures. I’ll see if I can get a photo of my workers this eve.
 

rkmcdon

Well-Known Member
Super easy. Gather up some dry leaves, crunch em up s bit into a dark bag, add some water to moisten them up, tie bag, poke some holes in the bag, and put them in a shady area for a year or 2.

Not sure if theres a quicker method of achieving the level of decay you want, but if you have your own property, it's almost effortless to make a leaf mould, and it's a great soil conditioner/compost additive
I was with you right up to the moment you said 2 years :lol: That's like 50 in stoner years!

Running a non draining container does work. I have never drained. I have had red wigglers for 20ish years. You just have to be on top of the moistness of your worm bedding. There is no need to keep the bedding so wet it is dripping. Your not after the runoff your after the castings.
I do live in Canada where it tends to be drier air wise than some places. Maybe that’s why I have success. Running a very large container is going to have a learning curve. A wide and shallow container will have more area for evaporation then a deep narrow so you will get away with feeding moist food. Most worm farms run shallow. Like 4” they feed the dry feed to the surface and mist with water. Hey also enoculate the surface with bennificial bacteria-microbes. I’m not sure what they use but that is what you want out of the worm castings. It’s more the live beneficials then nutrients. However the castings does have nutes. Just depends what you are feeding. I feed a mix of kitchen waste and chicken feed. Get the crumble. Do some research on the net there’s a plethora of info on worm farming. Keep us posted on your suscess-failures. I’ll see if I can get a photo of my workers this eve.
Thanks for the wealth of info Turpman! At this point i've decided i have to do the CFT based on the volume i need. The pic I posted above shouldn't be too challenging for me to build on a weekend.
I'll be starting with compost and ewc's which will have beneficials in them. Are you saying innoculate with more than that? Good to see a second vote for chicken feed as its much easier to obtain.
I'll post a pic here when i am able to build my worm bin, which of course means if you never hear from me again, i chickened out :shock:!
 

loco41

Well-Known Member
Thank you both!


So kitchen compost, dried leaves, grass clippings and plants (stalks and leaves ran through a chipper) will not be sufficient? Feeding soil amendments seems expensive, but if that's what's best, I can do it

Chicken feed? That's pretty cheap and easy to come by around here (I have to drive 400 miles round trip to get my soil amendments). That might not be a bad option
I myself am going to have to look into some chicken feed. I have used steel cut oats a lot lately in between the regular feedings of kitchen scraps, but feed is for sure cheaper and probably more beneficial in the long run.

I did make my first batch of bokashi bran and it seems to be a winner both in my recycling mix and worm bin. Again, I am nowhere near the scale you are, I have a one bedroom apartment to operate so it's a different ball game for me, but maybe looking into making some bokashi bran as another source of cheap bulk feed would be feasible. I imagine you could even inoculate the chicken feed if its ground up a bit and get the best of best worlds, but maybe the extra step of fermenting it isn't really worth the trouble, who knows just an option though..

Thanks for starting this thread though, lots of great info and I'm learning a lot on how to dial my bins in better from it. Scattered just a little bit of bran on some old cantaloupe rinds still hanging around and worms are plowing through it. Just sprinkled some of the top of all 3 bins though and will observe the frenzy though. The second picture is of a recycling soil bin that got a bunch of wet bran scattered about before I dried it.
 

Attachments

rkmcdon

Well-Known Member
I myself am going to have to look into some chicken feed. I have used steel cut oats a lot lately in between the regular feedings of kitchen scraps, but feed is for sure cheaper and probably more beneficial in the long run.

I did make my first batch of bokashi bran and it seems to be a winner both in my recycling mix and worm bin. Again, I am nowhere near the scale you are, I have a one bedroom apartment to operate so it's a different ball game for me, but maybe looking into making some bokashi bran as another source of cheap bulk feed would be feasible. I imagine you could even inoculate the chicken feed if its ground up a bit and get the best of best worlds, but maybe the extra step of fermenting it isn't really worth the trouble, who knows just an option though..

Thanks for starting this thread though, lots of great info and I'm learning a lot on how to dial my bins in better from it. Scattered just a little bit of bran on some old cantaloupe rinds still hanging around and worms are plowing through it. Just sprinkled some of the top of all 3 bins though and will observe the frenzy though. The second picture is of a recycling soil bin that got a bunch of wet bran scattered about before I dried it.
Glad this thread is helping and your setup is coming along!
I’ll have to look into bokashi. I was looking at what I have today and I actually have enough old compost to last for a while supplementing our kitchen scraps. I’ll also be putting in old soil for a while while I transition to my new recipe as well as old marijuana plants, so I actually think I’m golden for a while, especially when considering I’ll be mixing in some shredded cardboard, leaves and grass clippings.
ive decide that once my vermicompost is where it can fill my compost component in my soil mix, I’m switching to no till. In the meantime, the current soil with its amendments and rootballs should keep my worms happy

Hmmm, that’s assuming I can put soil withperlite into my worm bin. Hadn’t thought about that. Anyone know if that will cause problems?
 

rkmcdon

Well-Known Member
By the way, went by Home Depot today and bought lumber and metal pipe to build my worm bin! Not sure if I’ll get to start on It this weekend, but maybe....
 

MustangStudFarm

Well-Known Member
By the way, went by Home Depot today and bought lumber and metal pipe to build my worm bin! Not sure if I’ll get to start on It this weekend, but maybe....
I found some boards on sale at Lowes, they were 2x10x12 for $9.50 each. So, I took advantage. I built the first worm bin to see how things would go and it seems to be working out... I'll show you my setup, but keep in mind that this is a work in progress and it's messy. The boxes and plastic bags are from picking up free produce from a grocery store, you should look into finding one.

Here is my latest worm bin and these are the 2x10 that I was talking about. So, this is 12ft long x 4ft wide x 20" tall. Red Wigglers only go 18" deep, so keep that in mind. If you can see the black plastic crates in the background, that is from the grocery store donations. I'm currently working on building #2&3 bins... I did the math and this bin will hold 540 gallons.
DSC01315.JPG


The pallet worm bin was my 1st to build and I traded my neighbor some weed for them, so being creative can payoff. The bonus with this worm bin is that I don't have to buy any worms because they show up on their own, but I also live in the woods.
DSC01316.JPG


This is my regular compost pile that I use for leaves, rabbit bedding, and grass clippings. The compost will go into the worm bins along with expired produce. I got kinda lazy with the boxes, but there was just too many. I have 55gal drums for rain water and I would soak the boxes in them overnight to make the boxes wet and easier to work with(didn't do it to these).
DSC01317.JPG
 

rkmcdon

Well-Known Member
Wow, that's impressive. I thought i needed a lot of vermicompost! How much do you use? On your top design with the 2x12's, is that a flow through design or how do you harvest from it?
 

gibbo2838

New Member
I breed Red Wigglers and European Nightcrawlers as a side hustle. I found the best way to do things is to build up a large worm supply and experiment on different ideas with your excess worms. Also I don't take what I hear from people as gospel.

Everyone says Red Wigglers love living and feeding on the surface and also say they don't like it wet. I have stacked a "can o worms" 8 levels high with the same amount of 3/4 broken down compost in each level as bedding. The top levels stay a bit drier, the middle levels have the perfect moisture level and the bottom 2 levels are usually very soggy. The bottom 2 levels are about 3 feet lower than the top level, but I always find the majority of worms are in the 2 soggy bottom levels. This happens year round and I also swap the levels around from top to bottom to mix things up, as well as using different bedding material. Everyone says coco peat is great for worm bedding, but I have used it in one of the 8 levels moving it around from top to bottom and you barely ever find a worm in it.

I would never leave worms in a totally soggy container though. They must have the option to move around to other levels. I find a deeper wide bin or pile is more important than a shallow wide bin or pile, because the worms will be able to move to where they feel comfortable.

I add all my food scraps to large compost piles and never add scraps to my worm bins. My larger worm bins are always filled with the broken down compost and the worms froth over it, especially when I do a top up.

I'm not in the business of large scale vermicomposting and all my breeding is done indoors in smaller containers, but I can always scoop a couple buckets from any of my outside bins and use a 1/8 sieve to sift out all the worm castings I need.

Broken down compost, horse and cow manure are my favourite bedding materials because the worms love living in it and the also eat it as it brakes down.

This might not work for everyone, but I find that you are better off letting the worms tell you what they like.

I live in a warm temperate area and the temperatures range from -1 degree celsius (30 Fahrenheit) to 42 degree celsius (107 Fahrenheit)
 

rkmcdon

Well-Known Member
Thanks for the feedback @gibbo2838. I finally got started on my continuous flow through bin and posted the build here

My plan is to start it with bedding and old compost that I will rehydrate
 

chakup

Well-Known Member
Well I'll get an updated pic. I staked the original top down to go with LST, but it's wanting to grow as if topped. Original top doing nothing much but sides already starting to take off so a win.
 
Top