DIY E-Nail

budbro18

Well-Known Member
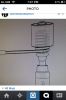
Looks good thanks for the PID settings. Do you know how much it changes due to different coil size?? Im assuming the coils are nearly identical just never know what a half turn extra or less of coil can do. Also how fragile are the coils? So if you type in the wrong settings will if fuck them up hard??

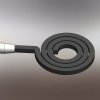
Also like the piece too. Looks perfect for a daily driver.

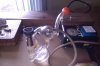
Also i think im going to use mini xlr for mine. I really like components that mount without any screws or bolts. Only problem is finding everything thats made for the same size wall thickness if it has clips. And to find screw mount components like the xlr/mini xlr.

Any problems you ran into that youd like to share so we dont??
 

LiquidJunglist

Well-Known Member
Well it has an auto tune function on it. Most/alot of PIDs do but im not 100% sure if ill need to do any other tuning.

With this one you basically set auto tun to run, set the temp youre mostly going to be at (between 5-7 ish) and it runs it through a process.

Lets it get to room temp, then heats it up to the designated temp at a medium rate, then lets it cool down back to room temp, then over shoots by a little, back to room temp, under shoots by a little, back to room temp, then right back to the set temp and holds it there for a few minutes. Gets a good sense of the thermocouple and heating element size. So itll probably be pretty quick since the heating element is so small most of these things are made for ovens and kilns so theyre probably used to runnin auto tune for an hour or so to get such a big area up to temp.

Heres a video of another PID running auto tune. Pretty boring but you get the idea.

[video=vimeo;42202506]http://vimeo.com/42202506[/video]


There are P I and D setting on the orignial DIY page that i can always reference if the auto tune doesnt work as well on my controller as it does with the one in the video.

Absolute worse case scenario i have a friend in school for electrical engineering whos crazy at math so he should know about the whole PID equation.
Ok so you put it in auto tune - set the average temp desired - then it goes through the auto tune. I was kinda curious about this part. I'm going to use the same PID some I'm glad your doing the same project.

SUBBED, glad to be back on the forum.
 

Fadedawg

Well-Known Member
Hee, hee, hee, my coil arrived today, and I already have an order of PID controllers enroute, so am looking for the enclosure. I'm thinking something re-purposed, so as to be suitable for all company, when left on an end table in the living room. Maybe Goodwill...........................
 

jdee

Active Member
Just a heads up if using the TA4 pid "NEVER hold down the blue autotune button on the TA4 controller as this PID controller will try to set the parameters it thinks it needs to use. This has resulted in burned out coils since the controller will overshoot the temperature greatly. This is a known issue with these units"

Only issue was not having a soldering iron tip small enough to wire the xlr panel mount connector, other than that everything was pretty straightforward. Dremel box (not like a pro...) make wiring harness using the required ring terminals, female spade terminals and male spade terminals. Connected everything as per the connection diagram. The neon light on my power button blew first time turning it on, other than that everything works great.

Using P=30 I=10.5 D=2.12 now since someone mentioned they like it better, I had to try it but not sure I can see much of a difference..perhaps it overshoots by a smaller margin with this setting when the temp slightly drops due to usage/vaping.
 

budbro18

Well-Known Member
Thanks for the info! I feel like if i ran the auto tune function id set it so much lower than the target temp. Something like 3-4 hundred maybe. Possibly lower to be safe and work my way up to the full temp to make sure it doesnt over shoot too much. I tried looking for the controller in the video but it comes as the whole kit you see there.

Ive seen some companies recently making them into book looking cases so you can just throw them up on the shelf and no one would know. Also a company that makes mini ones that are pretty damn small. Like hand sized. haha. Mines gonna be small but im waitin until i get all the parts to buy my case.

That pid you just posted looks almost exactly thesame as the one on the DIY page. Do you think if i set those PID settings first then ran auto tune it would maybe keep it in check? I doubt it but who knows.

Glad we got some fellow builders. You guys seen the flat coils they got lately?? Might have to make my next order some of them.

1391804233_HRC2.JPG
 

LiquidJunglist

Well-Known Member
Like this coil works one? There mega sick here PRINTS his own cases in a 3D printer I do believe. Glad I found this thread, thanks for starting it budbro.
 

Attachments

budbro18

Well-Known Member
Yup im on instagram so i see alot of e-nail makers and follow them i like the 3d printed ones but id prefer a molded case because as of now quality 3d printers capable of making layers as one very solid piece are very expensive. I dont doubt they have a good one but it seems its an extrusion one vs an epoxy print head spraying into a bin of plastic powder. I wanted to get a 3d printer and just make iphone cases to pay it off but thatll have to wait haha.

Also, fuck @humboldtenail. He tries to claim ownership to everyones e-nail who makes them like the one im planning to make. Anyone who uses a 1/32 din pid gets blown up by him and he calls them rip off scammers even though he ripped the idea from task at HE. Who in reality just took a soldering iron controller/oven/kiln controller and made his own heating coil for. This humboldt enail guy just posted a picture of the flat coils the other day saying he cant wait to try them even though domeless.com (@domelessdameon i think) posted pictures of them almost a month ago. Hes free to steal everyone elses ideas but dont dare steal his. Especially when there are a limited amount of "project boxes" available online. Just through my own searches i found everything he uses in his without ripping anything from his design.

Enough on the rant. haha

I was surprised that a diy enail thread wasnt started yet. Theres the one from reddit but i figured with how easy it was thered be afew threads on here or at least GC or ICmag. Also i dont go on reddit much myself but am an active forum poster/internet user so i assumed im not the only one who rarely goes on there.

I also like doin videos and have a pretty good camera so i can take good pictures and videos. I know myself, and i am very insecure when it comes to working with electricity. Even wiring up my DIY ballast from HTG i quadruple checked it before pluggin it in. Watched like 7 videos of other people doing it haha. I dont fucks with electricity.

So i understand how others must feel thinking "lets put an electrical device with enough current to kill me on a metal nail thats close to water and also close to my face" haha.

Well parts should be here sometime next week and assembly will begin!!!
 

LiquidJunglist

Well-Known Member
Lol your good brov were in the same boat. Ya I don't like how he claims to have invented it. And the small cases he use are there on Auber's website. Lol

were def looking at the same pages. I'll pm you my IG and KIK brov.
 

LiquidJunglist

Well-Known Member
Ya I like the domeless setup. I've talked to a dealer in China and they can make them just like those flat coils. But another user ordered some....
 

budbro18

Well-Known Member
Hell yeah thats a nice little set up you got.I just want to make mine as reliable as possible so thats why im going with the on/off switch with the fuse and power inlet all in one. Leave the front face open for the controller and maybe the plug for the coil. No on/off lights or lights to tell you when its up to temp. very simple.

We got a guy over there. Seen a few people get em on IG. Domeless.com has them for sale for a reasonable price too but youd have to cut off the connector or wire yours to their specifications. I really want one of the new domeless ceramic nails theyre coming out with. Perfectly made for the e-nails. And ceramic so no need to worry about fake ti or shitty glass fucking up. Or overpriced ti/quartz


I really need to find a glass blower who fucks with quartz. im tryin to get those d-nail quartz domeless nails made for well under 100+ as well which is ridiculous that they sell them for that much. Anyone know one/is one let me know!!! Help out the cause. haha.
 

LiquidJunglist

Well-Known Member
I've been looking at the High tech Titanium Domeless the guy was cool to tell me the diameter of the nail(5/8")even tho I'm not buying his enail. It's a cool design but that Coilworks one I posts is identical to the HE Infiniti Nail and a killer price.
 

budbro18

Well-Known Member
The coils i have are 16mm or 5/8" ID so thats what most e-nail ones are for. I heard HE is supposed to have a nail that just came out that is made for e-nails and only 80 bucks which is alot more reasonable than the 120+ youd pay for the infinity.
 

biblee

Active Member
I really need to find a glass blower who fucks with quartz. im tryin to get those d-nail quartz domeless nails made for well under 100+ as well which is ridiculous that they sell them for that much. Anyone know one/is one let me know!!! Help out the cause. haha.

I really had a hard time trying to wrap a coil around a quartz domeless nail. I broke a few in the process. I'm searching for a ceramic to fit my needs, but I have heard that some easily break with the coil wrapped tight.
 

budbro18

Well-Known Member
Have you seen the d-nail ones?? Theyre very sturdy. Theyre on the first page i posted 2 of them an 18 and 14 mm one.

Seems like theyve held up pretty well. Theyre probably a little more sturdy than the other domeless quartz nails i think youre thinking of.
 
Top