Nomads Landing 2013 Season

bottlekap

Member
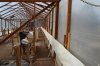
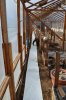
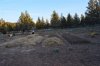
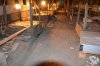
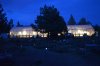
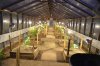
crunch time...down to the last week...perfect time for a snow storm...
View attachment 2606171
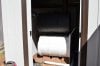
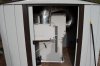
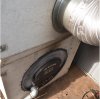
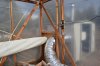
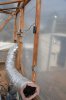
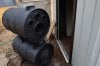
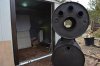
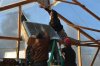
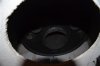
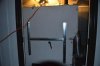
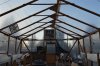
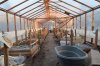
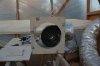
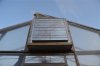
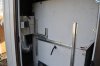
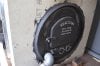
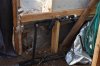
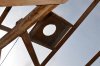
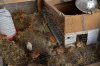
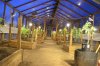
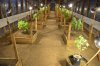
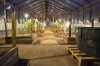
this week we continued work on the heating system...cut and assembled part of the cement board structure which will house the double barrel stoves...laid bricks in the south stove to prevent
the heat from burning out the bottom barrel...wired an electrical box and switch in the tin shed which will power and control fans
and blowers inside...
View attachment 2606175View attachment 2606173View attachment 2606174View attachment 2606172
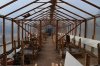
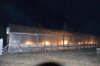
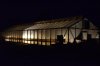
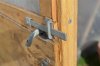
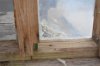
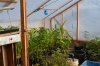
finished repairing the vents...the door on the west side of the greenhouse was becoming an inconvenience where
it was so we moved it a few panels south...
View attachment 2606176
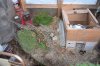
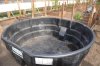
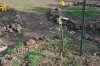
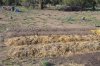
got the beginning of the irrigation system...tubes and connectors and what not...still
waiting on the water reservoir and pump...
View attachment 2606169
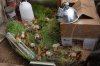
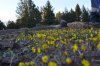
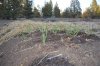
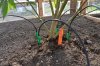
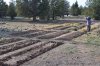
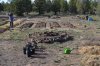
added a dose of diatomaceous earth to the beds...
View attachment 2606168View attachment 2606167
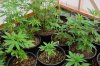
the light dep clones are still rooting but looking great...
View attachment 2606170
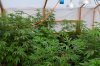
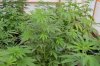
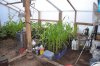
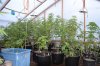
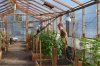
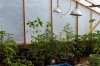
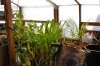
the full season plants are huge...its the last week in their 7 gallon homes...
fullseason2.jpg
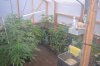
a few of them are getting to be too
big for the pots there in...seven more days till we plant...woo
 

bottlekap

Member
fullseason1.jpgfullseason2.jpgfullseason3.jpggreenhouse1.jpg


north stove assembly complete...preformed the first burn last night...the face of the stove got to about 1100 degrees...we still need to work out some of the kinks so we can properly supply the warm air throughout the greenhouse...
stove1.jpgstove3.jpgstove2.jpgstove4.jpggreenhouse2.jpgstove5.jpg

were holding out on completing the north stove until we fine tune the south one...
northstove1.jpgnorthstove2.jpggreenhouse3.jpg
50 tiny chicks have arrived and settled in quite nicely...in time they will provide nutrients to the garden and gardeners alike...
chickens.jpg
also...my wonderful girlfriend brought me home a darling baby puppy this week...Diesel Dawg...too cute...
diesel.jpg
busy busy busy...next week the Nomad Crew will be up in ashland OR for the yonder mountain string band show...ill try to get out here for a 4/20 update...until next time remember this time
 
DSC_0104.JPG
Bottlekap, Stuart and Spencer lifting the fan into position. We got it up there with an ole wooden block and tackle, but forgot to compensate for the extra 18" or so in length. So, here we put up a hook and ran a steel cable up there to pull it up the rest of the way, a couple of hooyas' and there it was. We are using this fan to exhuast out warm humid air at night time. Then fresh air comes in, which is cooler and less moisture, then we heat it up, as the air heats it will absorb and hold more moisture, then we exhaust it out, and repeat until we get to about 50% RH.

DSC_0146.JPGA view from the hot out hole in our North furnace, inside there under the barrel is another cement board with a four inch gap up front. This baffle makes the air from the cold air return flow past the bottom barrel through the gap then across the top barrel before entering the greenhouse at about 166' F.


DSC_0157.JPG
This is the North Furnace awaiting the cold air return plenum, and wiring.
DSC_0158.JPG
DSC_0160.JPG
Some late night shots of the greenhouse.

DSC_0166.JPG
Time of yellow for us up in at the tippy top of Cali. Next is purple, then white.


DSC_0167.JPG
DSC_0168.JPGSome veggie garden shots, mmm, mmmm. love garlic.
DSC_0173.JPGView of the north wall of the greenhouse, the electrical is done except for the north furnace, exhuast fan and shutter are up, HAF fans are up, whew... getting closer.
DSC_0172.JPGProgression shot of the greenhouse from the North end to the South.
DSC_0175.JPGThe cold air return plenum in construction. This is a 2 speed Dayton blower 470/320 cfm, the 2 speeds allow us the option of consuming less power and just in case the air moves to fast through the furnaces at 470 we can bump it down.


DSC_0176.JPGDSC_0178.JPGDSC_0180.JPG Ahh the moma house, here we got corn, compost tea brewers brewin, worm bins, photo lab, and the newest addition dinner...lol... chicks. We were having a fairly high mortality rate from vent plugging, then added some oatmeal to the mix and within 2 days all was well. Full season girls are in 7 gallon squats, momas are in 5 gallon pots, and the light dep is in 1 gallon pots getting ready for 7 gallon squats. Lots of foliar spraying, kelp, seaweeds, etc. Gotta jam, we'll be back.
 

Attachments

View attachment 2633080
Bottlekap, Stuart and Spencer lifting the fan into position. We got it up there with an ole wooden block and tackle, but forgot to compensate for the extra 18" or so in length. So, here we put up a hook and ran a steel cable up there to pull it up the rest of the way, a couple of hooyas' and there it was. We are using this fan to exhuast out warm humid air at night time. Then fresh air comes in, which is cooler and less moisture, then we heat it up, as the air heats it will absorb and hold more moisture, then we exhaust it out, and repeat until we get to about 50% RH.

View attachment 2633082A view from the hot out hole in our North furnace, inside there under the barrel is another cement board with a four inch gap up front. This baffle makes the air from the cold air return flow past the bottom barrel through the gap then across the top barrel before entering the greenhouse at about 166' F.


View attachment 2633085
This is the North Furnace awaiting the cold air return plenum, and wiring.
View attachment 2633087
View attachment 2633089
Some late night shots of the greenhouse.

View attachment 2633090
Time of yellow for us up in at the tippy top of Cali. Next is purple, then white.


View attachment 2633091
View attachment 2633092Some veggie garden shots, mmm, mmmm. love garlic.
View attachment 2633094View of the north wall of the greenhouse, the electrical is done except for the north furnace, exhuast fan and shutter are up, HAF fans are up, whew... getting closer.
View attachment 2633095Progression shot of the greenhouse from the North end to the South.
View attachment 2633096The cold air return plenum in construction. This is a 2 speed Dayton blower 470/320 cfm, the 2 speeds allow us the option of consuming less power and just in case the air moves to fast through the furnaces at 470 we can bump it down.


View attachment 2633097View attachment 2633098View attachment 2633100 Ahh the moma house, here we got corn, compost tea brewers brewin, worm bins, photo lab, and the newest addition dinner...lol... chicks. We were having a fairly high mortality rate from vent plugging, then added some oatmeal to the mix and within 2 days all was well. Full season girls are in 7 gallon squats, momas are in 5 gallon pots, and the light dep is in 1 gallon pots getting ready for 7 gallon squats. Lots of foliar spraying, kelp, seaweeds, etc. Gotta jam, we'll be back.
 
DSC_0181.JPGThe north furnace is finally finished except for mortaring the air diffuser for the draft blower and insulating the cement board box. That is the cold air return plenum there in the background all reved up and ready to go..,


DSC_0182.JPGThis is a view of the bottom barrel, you can see the 2" draft pipe connected to a 74 cfm blower motor on the other end. Burn times are about 3 hrs, with 165 degree output temps into the greenhouse.


DSC_0186.JPGAhhh, swimming pool, nope, 300 gallon water reservoir, so we can brew our teas and soups. Not to bad either, Zoro tools had this bad boy for $200.


DSC_0192.JPGThis is our irrigation system, all mains, manifold, and both circuits are fed with 3/4" id poly, from there H2o passes into a 1/4" on/off valve, then an 1/8" feeder tube, and finally to 6 gph sprayer stakes. These things rock. Just a groove for the water and a little seat that makes the water cover about 160'. 4 of these setups per bed. The stakes will be moved out as the plants get larger.


DSC_0193.JPGWhacked off the ends of the 2x2s on the rafters, they were to close to the plastic and condensation would run down hit the corner of the 2x2 and drip right on to the ladies, no good at flower time.


DSC_0194.JPGGarden hose connection, pressure regulator, sprinkler pump pvc hookup, filter, and on/off valves for each of the 2 circuits at the bottom there.


DSC_0195.JPGNipple high by 4th of July, how about by Cinco de Mayo baby.


DSC_0196.JPGinstalled door latches keep them suckers tight and closed during our occasional 60 mph wind gusts.


DSC_0197.JPGCovered the old chimney holes with some 6 mil film


DSC_0198.JPGWent around and patched other numerous holes as well


DSC_0199.JPGOrchard shot, the little trees are handling the cold temps very well mid 20s and no agrobon, the paiute orchard grass and hykon japanese rose clover are doing well


DSC_0200.JPGVeggie garden still going, and getting bigger that is, new beds to the south, working beds to the north.


DSC_0201.JPGand panning


DSC_0202.JPGand panning one more time.


DSC_0204.JPGChicks are kickin ass, and getting bigger every day, then love playing king of the hill


DSC_0205.JPGTime to spread things out in the moma room, 1 of 3


DSC_0206.JPG2 of 3


DSC_0207.JPG3 of 3 Nothin like homegrown corn.


DSC_0208.JPGNew pup, Ashlatubby's boy, crossed with a border collie/


DSC_0210.JPGand the brother, to that pup I found crying in the juniper woods behind us about 1/2 mile out. Maybe the owner will let us keep him too. We'll see.


DSC_0213.JPGGreenhouse at dusk, supplemental lighting is on until about 9:30


DSC_0214.JPGAlright, finally got the girls in the ground, still gotta transplant the 4 potters other than that, oh yeah.


DSC_0215.JPGHigher perspective from the south end


DSC_0216.JPGfrom the north, we took 2 days to clean all our building mess up, and still gotta do the outside, but we also derocked the pathways, washed the inside with high pressure water, then a long pole and scrubber at the end dipped in soapy water. Finally a high pressure spray to the outside, which we are going to be doing weekly.


DSC_0218.JPGhigher perspective from the north
 
So here is a list of what we put into the beds with the amounts: Our beds are 32 cubic feet of 3 year old garden soil. That original soil consisted of 1 part native clay, 1 part composted horse/goat/cow manure, 1 part sand (from an alfalfa field across the valley). We didn't have monies for soil amendments that year, so we bottle fed. The 2nd year "bottle fed' again and added Shasta Garden Blend top soil, from Native Grounds Nursery in Mt. Shasta. Third year, guess what we did...you got it! " bottle fed" again, adding no amendments; but this year....
15 pounds of Blood Meal, 15 pounds of 0-5-0 guano, 15 pounds of fish bone meal, 2&1/2 cups of Epsom salt, 3 cups of gypsum,6 tablespoons of powdered humic acid, 4 cups of soybean meal, 13 and 1/2 cups of alfalfa meal, 12 cups of green sand, 12 cups of soft rock phosphate, 12 cups of DE, 1 and 1/2 pounds of diamond K-mag, 13 and 1/2 cups of leonardite, and 2 cups of azomite.

For the light depo girls: This ratio is for 10 gallons of soil mixture.
Soil mixture: 3 gallons of Mt. Shasta garden compost, 1 1/2 gallons of perlite, 1 1/2 gallons of coco coir , 4 gallons of garden and bloom potting mix, 1 cup of earth worm castings and 1/2 teaspoon of great white mycorrhizae.
Alright! now we got our base mix lets add: 1 cup of alfalfa meal, 1 cup gypsum, 1 cup green sand, 1 cup soft rock phosphate, 3/4 cup of DE, 3 tablespoons of Diamond K -mag, 1 tablespoon leonardite, 1 and 1/2 cup of fish bone meal, 6 tablespoons of azomite, 6 tablespoons epsum salt, 1/4 cup of soybean meal, 1 tablespoon of powdered humic acid
 
Top