Poormans super closet muwahahahahahaha!!

0calli

Well-Known Member
:weed: Hello out there RIUions today im putting up my thread for making your own POORMAN'S SUPER CLOSET !~!~!~!~! :weed:

items needed

1. closet ........size dosent matter but not too small
2. 2 fans
3. bathroom exaughst fan 70 cfm
4. 3 mylar blankets
5. 1 timer
6. 1 power bar
7. 1 1000w ballast (optional)
8. 1 1000w hps HID bulb
9. E 39 mogul socket
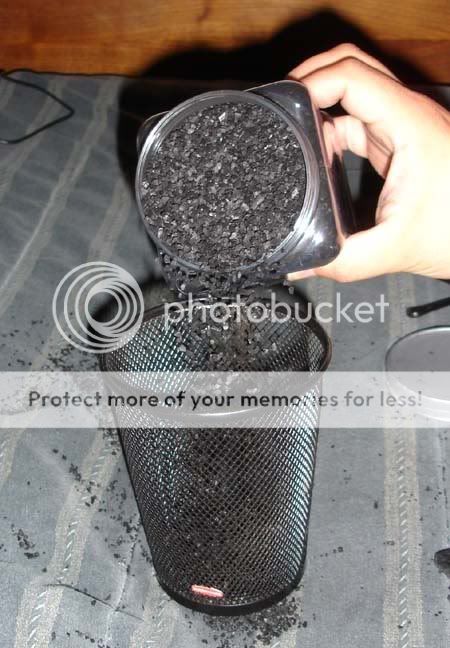
10. 3 2l bottles
11. bag of activated yeast
12. 1 bag of sugar
13. 3 L of warm water
14. 20 ft of aquarium tubbing
15. 1 self unit slotted bars and arms
16. ac unit
17. 4x4 piece of styrofoam

Tools needed

1. skil saw
2. drill
3. hot glue gun
4. drill bits
5. screws


so okay im going to explain the way i produced my SUPER POORMAN'S CLOSET !

Ok so first you need to buy (yard sale cheap) a closet or build your own i bought this one for 10 bucks and i modified the front for single door access GRW CLST 2 X 3.5 X 5.9.jpg you are going to go ahead and line the inside with mylar blanketing you can tape , staple or what i use is a hot glue gun to attach it to the innards of the closet for growing. GRW CLST (2).jpg100_0250.jpgbut i might add before you do the mylar you will need to cut 2 holes into the side and top of the closet 1 cut a hole in the side of the closet and attach fan to bring in fresh air then cut a hole in the top this is where you hps socket and exaughst fan are going to go through and mount like below and here you see the ballast to the right with a computer fan cooling it whilst running and to the left i where i cut the hole for e-39 socket entry and for the mount for bathroom exaughst fan100_0270.jpg100_0249.jpgIMG_0494.jpgIMG_0498.jpgso after all that then you are going to install your shelving unit into the closet GRW CLST (3).jpgWW , AK-48 , .jpgonce done that you can start wiring everything together (be careful this is not for dummies) once you got all that done you can start finishing off i hori. hang my light buy taking some wire and wrap a prat of the bulb and screw other end of wire to a part of the closet to achieve this then after this the optional part is to attach a AC unit to do this place shelving unit on the door and cut 2 holes one for intake the other for air flow like below100_0687.jpgIMG_0490.jpg100_0693.jpg
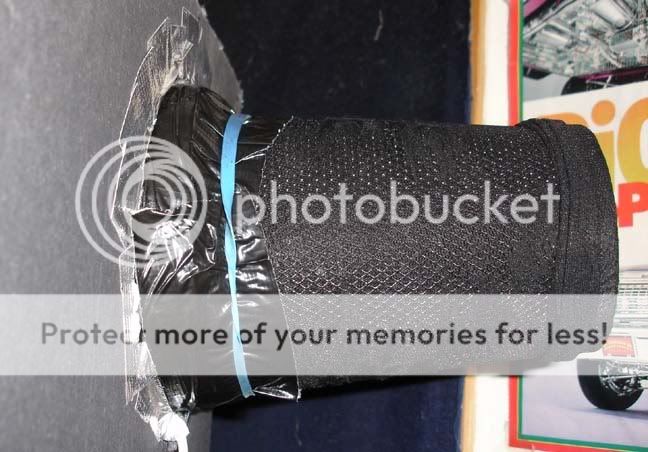
here im showing covering up the light leak from the cut hole for the air flow inIMG_0496.jpghere is the cut hole for air flowIMG_0492.jpgand the hole for intakeIMG_0493.jpg
 

Attachments

0calli

Well-Known Member
so once done all this next is too add your co2 system i put in 3 bottles cause im growing 6 plants so 2 plants to 1 bottle . first rinse and dry bottles then take tops drill two holes just the size of your tubing and cut tubing accordingly to the length you need to reach your plants , then glue tubing with hot glue to seal it then add 1 1/2 tbsp of activated yeast and 3/4 cup of sugar then add warm water and sake very well then attach all tops and let sit for about 10 minutes then you are going to test it to make sure it is producing co2. to do this your going to get a cup of water ( clear glass ) and put your tubes into the water and wait for bubbles to start bubbling out of the tube once you see this success and just put into closet and hang tubing into the foiliar of your plants like below View attachment 1821192here are the results of success bubble actionView attachment 1821194View attachment 1821195View attachment 1821196here is the placement of the bottles in the closet also above is a fan ( 2nd optional fan ) i use this for foliar movement and to push around the co2 in the canopy View attachment 1821197View attachment 1821198View attachment 1821199View attachment 1821200View attachment 1821201and there you have it that is how i did my POORMAN'S SUPER CLOSET....... ohh you can also buy a temp humidity monitor to help dial in the closet for best results from your plants . So if i forgot something or you would like to know more or need clearing up on what i have done here please post away or pm me thnx and happy growing :weed: :clap:
 

0calli

Well-Known Member
One other step i forgot was the making of the hood with your 4x4 styrofoam for youe fan covering for light leak and also by doing this i have created a spot for clones and seedlings to get indirect 1000w light from the closet i guess you can say the closet is multi-functional tooView attachment 1821213100_0696.jpg100_0695.jpg
 

massah

Well-Known Member
I see a fire happening with that 1000watt HPS sitting just a couple inches away from particleboard with no real protection :(
 

0calli

Well-Known Member
Originally Posted by Wolfman Zen
So my girls have been giving off their sweet sensual perfume for days now, and I know I should have done this sooner... but here is my DIY carbon filter..

Picked up a few things at walmart.

Black duck-tape
Black "Pencil cup"
Smaller black "Pencil cup"
Black ladies socks (pantyhose)
Activated carbon


Poor some carbon in the mesh like "pencil cup"


.... just enough so the smaller cup is level with the larger cup.


Slip the smaller cup into the sock


Tuck the sock into the smaller cup holding the end of the sock. Pore in the carbon.. keep holding the end of the sock.


Now pull on the end of the sock and use your finger to guide the carbon into the space between both cups until filled.


Now pull the end of the sock over the entire filter.. twist the end of the sock at the bottom and pull it up over the end of the cup.


Now simply use duck-tape to place the filter over your exhaust fan. I used a rubber band to secure it...


Works great... though I already miss that sweet aroma =[
 

0calli

Well-Known Member
Hey guys just finished my DIY carbon filter and boy it works better than i thought thanx slimmy for the link

filled till small cup was level with the rimm of the big can

then filled the side all the way up to the rim


then i used paper towel to block airflow from coming backwards and to force the air through all the carbon no leaks !!

here is an finished inside look

and here she is all completed ready to be mounted

the fruits of my hard labor

and here she is installed and working hard ( gotta love the duct tape i saw it and couldnt resist lol )


but as you can also see i didnt use the larger mesh cup cause im experimenting with having a more enclosed capsul with less leaks for the air so it kinda compresses in there and really gets scrubbed by the carbon............i figure it will work it makes sense to me
 

joey555

New Member
One other step i forgot was the making of the hood with your 4x4 styrofoam for youe fan covering for light leak and also by doing this i have created a spot for clones and seedlings to get indirect 1000w light from the closet i guess you can say the closet is multi-functional tooView attachment 1821213View attachment 1821211View attachment 1821212
now after this i def. gotta go.....but i will read more of this and the other one as well. but check out my profile area-right? see the group i joined...see? i had close to the same thing in mind, but lacked the detail and knowledge u have. when my hps comes ill be going to u-haul (they have a place near me which is real convienient) and pick up 1 or 2 refrigerator boxes.......i was thinking of knocking or cutting one wall down and make it 1 big box. know what i mean? like making an extention to ur house...i.e. knocking a wall down and blending/or merging it w/ the living room say. then i will hook it up in my basement. b/c my daughter is 6 now and starting to wonder why she can't go in daddy's room. tho she never said it....im quite sure she is thinking it. peace bro.....joey-out
 

maineyankee

Active Member
I have to admire the many "McGuyver's" that are out there when it comes to taking ordinary items found around the house, and making it into a workable unit such as these two things (Closet and Air Filter) ... I def will be keeping tabs on seeing how this works in your future posts ...

The MaineYankee
 

0calli

Well-Known Member
new thing guys the carbon filter i made works wounders but you must drill more or bigger holes if you do my setup for carbon filter
 

ChronicObsession

Well-Known Member
nice fotos of your Super CLoset, 0cali, but I have to admit that you should change your avatar, because I LOLed too much and then didn't have any attention left over for reading anything on this thread... LOL I like the part where he thrusts bullets from the gun's butt.
 

fssalaska

Well-Known Member
that pic of the 1000 watt hps light looks dangerous. careful not to burn the house down..
other than the hps it looks awesome !

 
Top