Wanting to set up a DWC

papa canna

Well-Known Member
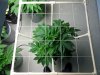
I'm getting ready to start setting up a non circulating DWC. But I have quite a few questions and finding answers can be tough. I'm working with a single 600 watt light, and plan to do a bit of topping.

How many plants would be best? I was thinking 4 or 6.

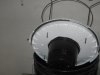
what size net pot should I use? I saw a couple people claiming larger net pots were slowing down root development.

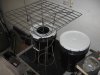
I am going to use 5 gallon coolers as my res. What tool should I use to cut the holes for netpots?

how high do I need the air pump rated for?

Is it a huge pain to top off the reservoirs? And how do you go about it? Do you just lift a heavy netpot out with roots and plant in all?

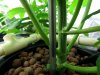
Is hydroton the best medium to use?

I will edit the original post if (more likely when) I think of any more questions. any help appreciated.
 

hondagrower420

Well-Known Member
1. Depends on veg time. More veg time = less plants.

2. 6in net pots are good. To small and the plant might fall over later in bloom.

3. Hole saw. 6in

4. As much as possible.

5.elevate and install a drain.

6. Clay pebbles work. Lava rock or smooth pebbles work also.
 

Gregor Eisenhorn

Well-Known Member
Cut out a hole that is the same size as the net pot, then you just lift the whole bucket lid off if you want to take a peak, top off, reservoir change etc.

And there is a "How to DWC" thread here if you're still confused, good information there.
 

papa canna

Well-Known Member
1. Depends on veg time. More veg time = less plants.

2. 6in net pots are good. To small and the plant might fall over later in bloom.

3. Hole saw. 6in

4. As much as possible.

5.elevate and install a drain.

6. Clay pebbles work. Lava rock or smooth pebbles work also.
Can you eleaborate about elevate and install a drain? Are you talking about a circulating?
 

papa canna

Well-Known Member
No. Raise it up off the ground. Go to home depot or lowes and buy a hose drain valve. Its like a bulk head fitting.
So you put hose fittings on the button, put a hose fitting on the nearest sink and top them off that way?

Also, at what point do you allow the roots to make contact with your solution?
 
Last edited:

hondagrower420

Well-Known Member
So you put hose fittings on the button, put a hose fitting on the nearest sink and top them off that way?

Also, at what point do you allow the roots to make contact with your solution?
Bottom or lowest point possible. Yesz you can drain and fill. Google "drill pump”

The sooner the roots hit the soup, the better. Usually takes 1 or 2 weeks for the roots to bridge the gap.
 

papa canna

Well-Known Member
I do (4) 2x2 scrogged plants under a 600w.

Works out to a 4x4 area.

Pulls 1.5 gpw with the right strains.
I was thinking 4 as well. But some other people were telling me that I could probably fill the 4x4 with just 2. Sounds tough to me. Do you know the simplest way I could make a scrog? I saw anon emaus made his somehow with some simple pvc fittings. But its got me wondering you do you res changes with a screen like that going on.
 

firsttimeARE

Well-Known Member
I was thinking 4 as well. But some other people were telling me that I could probably fill the 4x4 with just 2. Sounds tough to me. Do you know the simplest way I could make a scrog? I saw anon emaus made his somehow with some simple pvc fittings. But its got me wondering you do you res changes with a screen like that going on.
I make a smaller square out of 1/2" cpvc with tees on each side piece in the middle. This angles outwards to connect pipe to another tee thats on a larger square. This larger square is your screen. The bottom smaller square is what mounts to the netpot lid.

I drill two 1/4" holes into the lid and the pipes to put 1/4" nylon bolts thru. I use 2" lengths and put nuts on the inside of the lid and put neoprene washers on the lid betweem the pipes to prevent light from coming in.

This makes the screen unitized with the lid. So res changes are the same.

You can either screw screws at the top of the screen to wrap string around or what I did is drilled holes in the big square to weave string through to form the grid.
 

papa canna

Well-Known Member
I make a smaller square out of 1/2" cpvc with tees on each side piece in the middle. This angles outwards to connect pipe to another tee thats on a larger square. This larger square is your screen. The bottom smaller square is what mounts to the netpot lid.

I drill two 1/4" holes into the lid and the pipes to put 1/4" nylon bolts thru. I use 2" lengths and put nuts on the inside of the lid and put neoprene washers on the lid betweem the pipes to prevent light from coming in.

This makes the screen unitized with the lid. So res changes are the same.

You can either screw screws at the top of the screen to wrap string around or what I did is drilled holes in the big square to weave string through to form the grid.
you referring to something like this? https://www.rollitup.org/t/diy-dwc-5-gallon-scrog.510210/
 

mytwhyt

Well-Known Member
First you need a 4 legged tomato cage... Cut the top ring off... Then you bend the wires that are sticking up, at a 90* angle... It's important to bend the wires a 1/2 inch above the ring... if you try to bend the wire where it's welded to the ring, it'll break every time... ask me how i know... cut off bottom part of the cage as shown... Then its just a matter of tying a screen on with zip ties..... Hint, cut off all but 4 tabs on the lid, it'll still seal and won't be such a bitch to get off... That's the reservoir next to the grow bucket... Drill the holes with a 13/16" spade bit, for 1/2 inch grommets...image_19991.jpg image_19992.jpg image_19993.jpg
 

firsttimeARE

Well-Known Member
But doesn't a stand alone screen make res changes and adding water a bitch? You have to reset everything each time wouldn't you? A scrog that attached to the lid sounded a little more user friendly
Did you actually read what I posted? Because it is a unitized screen. Was on phone earlier, but here I will make it easy for you.

SAM_2497.JPG SAM_2510.JPG
This is the bottom square that attaches to the netpot lid. Not shown is 1/4" nylon nuts on the inside securing the bottom square to the lid.

SAM_2528.JPG SAM_2540.JPG
This is what it looks like with the top attached. Those diagonal pieces go from the top larger square to the bottom square.

I can lift a plant out of the res by holding onto the screen and lifting. Its solid.
 

firsttimeARE

Well-Known Member
First you need a 4 legged tomato cage... Cut the top ring off... Then you bend the wires that are sticking up, at a 90* angle... It's important to bend the wires a 1/2 inch above the ring... if you try to bend the wire where it's welded to the ring, it'll break every time... ask me how i know... cut off bottom part of the cage as shown... Then its just a matter of tying a screen on with zip ties..... Hint, cut off all but 4 tabs on the lid, it'll still seal and won't be such a bitch to get off... That's the reservoir next to the grow bucket... Drill the holes with a 13/16" spade bit, for 1/2 inch grommets..
Thanks, but I like my design better. Looks and is a lot cleaner.

I made 8 screens in about 2 hours. Just a pipe cutter and a drill for holes to thread the string. I could have drilled tiny screws into the top and wrapped the string around the heads. It is more time consuming to do it the way I did, but the finished product looks better.
 

firsttimeARE

Well-Known Member
The elbows bending up is there to tie up branching if needed. This was in veg so I didn't have it on. But it just has two riser pieces that fit into each of the elbows and an elbow on top of each riser that connects to a horizontal piece.
 
Top