Complete Guide To Using STS To Make Fem Seeds

TheManicOrganicDK

Well-Known Member
Recently i have been searching for a decent STS fem guide and found a very comprehensive one at 420mag, so thought i´d share it here.

So, i didnt write the guide, i am just quite good at copy/paste. :-)


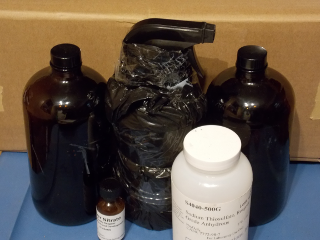
Make Your Own Excellent Quality, Feminized Pollen/Seeds Using Silver Thiosulfate Solution (STS)

Feminized Seeds are Awesome

Hermaphrodite plants are not awesome. Fortunately, it's possible to create cleanly produced feminized pollen. This pollen can be used to create seeds which are 99.9% female. As long as logical safeguards are taken, these seeds will not be any more sensitive to becoming hermaphrodite than the parent plants

This particular recipe for STS was originally published by Robert C. Clark. Today it is arguably the most recommended and successfully used method of feminizing cannabis. This write up includes the original recipe, along with practical useage tips and other helpful information gained through experience.

I know you'll be greatly pleased with your results. :)


Early-Dane-Spitting-Pollen-adjusted.png


Non-Hermaphrodite Plants Begin With the Parents

Stress testing your female plants is essential to removing breeding plants with hermaphroditic tendencies.
Even if you're not using feminized pollen, breeding with unstable parents can produce hermaphroditic seeds. It's extremely important to expose your potential parents to the stresses most commonly known to trigger hermaphroditic flower production. These include, but are not limited to, the following stresses:
  • Inconsistent Light Schedules
  • Pinhole Light Leaks During Flowering
  • Excess or Extreme Changes in Temperature
  • Bound Roots
  • pH too Low/High
  • Lighting Spectrum Change
  • Media Excessively Wet/Dry
  • Excessive Supercropping/Heavy-Trimming
  • Root Pruning
  • Proximity to Sessions (just making sure you're reading. lol)
  • Over/Under Feeding
  • Incorrect Nutrient Profile
  • Insects/Disease/Fungi
  • Pesticide/Chemical Exposure
  • Extended Flowering Time
Only females which stay 100% female should be used for breeding purposes.

Yes, Stress Testing

Choosing excellent parents can take a long time and consume a lot of resources. These factors are the main reason so many unstable seeds are available today (2018), Patience and persistence pays off here. The more stable the genetics you're working with, the quicker you'll have a large enough number of potential parents. Each stress takes 1-3 weeks to form male flowers. Stressing multiple clones, of the same plant, ensures accuracy of the test results.

The more stable the original female plants, the more valuable the end seeds will be. Keep stressing until you're absolutely sure the plant is stable. Again, be prepared for this process to take quite a while. Every extra ounce of effort you put into this portion of the program will pay you back in greatly increased quality. You can do it!:D


~ To be continued
 

TheManicOrganicDK

Well-Known Member
Silver Thiosulfate Solution (STS)
Molecule-Silver-Thiosulfate.png

(Image Rights chemspider.com)

STS is the most commonly used chemical mix, for creating stable feminized pollen. While it may not be the only method, it is arguably the most commonly used and is quite reliable. Female cannabis plants require ethylene production to form female flowers. Without ethylene being produced, the female cannabis plant will produce male flowers full of feminzed pollen. Silver Thiosulfate Solution(STS) suppresses ethylene production in plants. When this solution is properly applied to the bud sites of a cannabis plant, the plant will not produce ethylene. Again, without the ethylene, male flowers form.

The Basics of Making Silver Thiosulfate Solution
Can you mix a powdered drink mix? Congratulations! :D You have the skills to make Silver Thiosulfate Solution. STS is mixed up in two parts called "stock" solutions. These solutions are labeled A and B. Solution A is a mixture of silver nitrate and distilled water. Solution B is a mixture of sodium thiosulfate and distilled water. These two solutions can be kept in light-proof bottles, sealed and refridgerated, for extended periods of time, even years.


Once solutions A and B are mixed together, the resulting mix is diluted with distilled water before using. Once mixed, the STS (both full strength and diluted) must be kept from light, and can be used up to a month when stored properly. I've used mixed and diluted solution which was kept in my refridgerator for over 9 months, but fresh solution definitely works the best.

Tools and Materials You Will Need
Where possible, I have linked the exact items I purchased and used. The remaining items I had around the house. 500g of Sodium thiosulfate anhydrous is a LOT of thiosulfate, so smaller projects may want to use the pentahydrate verion, because it's available in smaller sizes.
  • Silver Nitrate
  • Sodium Thiosulfate (Anhydrus and Pentahydrate Both Work)
  • Distilled or Reverse Osmosis Water
  • A Digital Scale Accurate to 0.1g
  • 2 32oz Brown Glass Bottles
  • 32oz Brown Glass Bottle w/Black Sprayer Top
  • 33 Gallon Black Trash Bag
  • Tape
  • 60 cc/ml Syringe
  • Surfactant (Yucca-Extract)
  • A Cool Dark Place for Storage (Fridge)
  • Nitrile Gloves
  • 500ml/2 Cup Glass Mixing Container
  • Small wire whisk
  • Safety Goggles
Basic Safety Recommendations
The following steps require careful measuring, along with basic chemical safety. It is strongly recommended you work on a flat surface with a plastic sheet or several layers of newspaper to protect it. Silver nitrate does stain brown to black, so gloves and safety goggles are recommended.
Sodium thiosulfate has a very low toxicity, make sure you still wash up any spills well to remove all concern. Both of these solutions can be safely rinsed down the drain, when followed by a large amount of water.

~ To be continued
 

TheManicOrganicDK

Well-Known Member
Measuring and Mixing Stock Solution "A"
  • Fill your 500ml measuring cup with 500ml of distilled water
  • Measure out .5g of Silver Nitrate
  • Mix the silver nitrate powder into the 500ml of distilled water
  • Pour the silver nitrate solution into a brown glass bottle and seal tightly
  • Label the bottle "A" Silver Nitrate
  • Thoroughly clean the 500ml container and rinse with distilled water
Measuring and Mixing Stock Solution "B"
  • Fill the 500ml container with 500ml of distilled water
  • Measure out 2.5 grams of sodium thiosulfate anhydrous, OR 3.9g of sodium thiosulfate pentahydrate
  • Mix the sodium thiosulfate with the 500ml of distilled water
  • Pour the sodium thiosulfate solution into a brown glass bottle and seal it tightly
  • Label the bottle "B" Sodium Thiosulfate
  • Thoroughly clean the 500ml container and rinse with distilled water
Keep Both "A" and "B" Solutions Cool and Dark!

Mixing and Diluting STS

The next step is to mix the two stock solutions together properly, creating the actual Silver Thiosulfate Solution (STS).
Before using the STS, it must be diluted to a weak solution for spraying!
  • Measure 50ml of stock solution "B" with the 60cc syringe and gently squirt it in the 500ml glass measure
  • Thoroughly rinse the syringe with distilled water, or change to a new syringe
  • Measure 50ml of stock solution "A" with the 60cc syringe
  • While whisking solution "B" in the glass measure, slowly squirt solution "A" into the glass measure in less than 30 seconds
  • Pour the mixed solution into the 32oz brown glass bottle with black sprayer top
  • Add 900ml of distilled water to fill the sprayer the rest of the way, leaving room for a little bit of surfactant
  • Add yucca extract in small amounts and shake well
  • Test spray on a leaf to if solution still beads up and rolls off
  • Add additional yucca extract and shake well, until the solution spreads across the leaf instead of beading up
  • Thoroughly rinse all tools using more rinse water than usual
You now have a sprayer bottle with a 1:9 dilution of STS and water. You want to do your best to protect it from light and heat. Personally, I wrap the bottle section with a black plastic trash bag and tape it in place. This is for additional light protection while it stores in my fridge. I've successfully used 9 month old solution which was wrapped and stored in my fridge this way.


Chems-n-bottles-n-sprayer-med.png


Successfully Using STS!
I've spent a great deal of time researching the best method(s) to use for success with STS. First I'm going to detail the steps I've used successfully myself. I'm also including the thoughts and tips I've picked up from other growers. Cannabis is a nearly infinitely variable plant, so it's best if you have information from as many sources as possible. Who knows which tip will specifically fit your plants and setup. ;)
Regardless of the spraying schedule you use, be sure to thoroughly saturate the branch(es) and beginning flower clusters.

Spraying Schedule I've Used Successfully
  • Spray branch(es) you want reversed 5 days before flipping to flower
  • Spray every 5 days until major male flower formation has begun
Alternative Spraying Schedule A
  • Spray branch(es) you want reversed 2 weeks before flower
  • Spray branch(es) you want reversed on the day you flip to flower
Alternative Spraying Schedule B
  • Spray branch(es) you want reversed on the day you flip to flower
A Note on STS "Burning" the Plant
Many growers have reported the STS solution 'burning' the plant. I strongly recommend diluting your spray further than 1:9, if you experience any burning of your plants.

Additional Tips and Tricks
As always, the more information you have, the better you can potentially achieve. The following are little things which can make a big difference in your results.

Using Clones
When possible, I've found it immensely helpful to work with clones of the same plant, reversing one or more for pollen in a small flowering area first. The pollen is collected and stored. At this point, the pollen can be used on any female plants, including clones of itself.
Though it does involve a second step of collecting and preserving the pollen until use, it allows you to create seeds without dealing with a reversed plant in the room. An additional up side is the ability to store the pollen for years, when preserved properly.

Pollen Control
I STRONGLY recommend using filtered intakes and outtakes on any flowering environment you're creating or using pollen in. Many growers have reported developing allergies to cannabis pollen, after working with it for years on end. Filtering the air going in and out of your flowering rooms keeps pollen contained. (mostly lol)

I use spray bottles of r/o filtered water and spray down the air in the room, any time I didsturb pollen. Knock the pollen out of the air after every session of working with pollen. Be sure to spray down the insides of tents and flower rooms after each run. This will minimize cross contamination from different pollen sources.

Diluting Your Pollen
Any visible bit of pollen you can see is made up of millions of bits of pollen, making one pollen per pistil pollination impossible. Mixing your pollen at one part pollen to 50 parts corn starch or flour prevents waste. Each pistil requires only one bit of pollen to create a seed and the dilution makes this easy.

Using a Makeup Brush to Pollinate With
Many growers report excellent results with evenly pollinating plants, when they use a clean makeup brush. The brush allows easy application of the pollen evenly across the plant. When the pollen is diluted with flour, you're easily able to see which flowers you've already pollinated.

Storing Your Pollen for Years (Possibly 10+ Years)
Pollen can be stored for a long time in a freezer, as long as it has been thorougly dried. Silica packs do not absorb down to a low enough relative humidity, so dried rice is used.

Heat un-cooked rice in an oven at 150F-170F for at least 12hrs. Pour the hot rice into a sealable glass container (I personally use large peanut butter jars). Seal the jar and let it cool to room temperature.

Collect your pollen and carefully transfer it to a foil baking cup or other small container which fits in the jar. Seal the pollen in the rice container and set it in a cool, dark place for 7 days.

Toast some flour in a skillet on the stove until it is a dark tan color, then seal hot in another glass, airtight container and let cool to room temperature. This will remove the moisture from the flour.

Remove the pollen from the dried rice jar and mix it at a ratio of 1 part pollen to 50 parts flour.

Seal the mixed pollen in small containers, foil or plastic sealed pouches or (preferred) 1.5ml centrifuge tubes.

LABEL your containers carefully, using the specific plant name, date and any other information you believe you'll remember later. (Because there's a good chance you won't)

Seal the containers in a thermos and keep it in your freezer. The thermos acts as an additional thermal protection barrier, just in case you have a freezer issue years down the line. It also makes transferring pollen from one place to another a safe operation. Just be sure to keep the thermos at freezing temps, and to limit the amount of time outside the freezer.

Stubborn Female Refusing to Turn?
While the most stable female plants are the type of plants we strongly want to breed with, they are often difficult to get quality amounts of pollen from. These tips should help even the most stubborn female in your stable flip large amounts of viable pollen.

Test Different Spray Schedules
Flower out small clones of the plant you want to reverse. Use a different spray schedule with each clone, keeping careful track. You may find one schedule works much better than the others.

Use Colloidal Silver
Some growers have reported success with the alternative spray schedules, with a follow up spraying of a high ppm colloidal silver solution, 2-3 weeks into flower.

Collect, Dry and Crush the Pods
Have a plant growing great big clusters of male flowers which don't seem to open, or don't have much pollen when they do open?

When the pods have swelled and look like they are fully mature and should be opening, cut them off the stem. Wrap the clusters in paper towels and bury them in a sealed jar of dried rice. (Heat un-cooked rice in an oven at 150-170F for at least 12hrs and cool in a sealed jar) The rice will absorb the moisture from the pods and dry them completely.

When the pods are completely dry and crispy, gently crush them through a tea strainer, or similar fine mesh strainer. You'll find large quantities of viable pollen.

Old Spray (9+ Months)
When the sprayer bottle is properly protected from light, and kept in a cool place, the mixed STS can remain viable for months. You can check to see if the solution will most likely work by pouring a bit out in a clear glass. The solution should be crystal clear.

Any darkening of the solution means at least some of the silver has tarnished. Only use clear solution for best results. Here is a picture of a plant I reversed using STS which had been mixed and stored in my fridge for over 9 months. You can see it worked, but I believe the dish soap (instead of yucca) I added stressed the plant.


Poor-formation-Tsue-9-month-old-sts.png


Now you just gotta get at it.

~ Namaste
 

TheManicOrganicDK

Well-Known Member
Not a bad write up. I have one thing to add.

Spray where you won't get the solution on countertops or anything that might stain as the STS solution will cause purple staining and it's a chore to remove the stains. Don't ask me how I know.
Thats a very nice addition. :-)

Thanks for the heads up.
 

Poontanger

Well-Known Member
How many days from flip is the best time to apply pollen to a female head to produce seeds
Or do you do it at multiple intervals.
Thx
 

Rurumo

Well-Known Member
How many days from flip is the best time to apply pollen to a female head to produce seeds
Or do you do it at multiple intervals.
Thx
Kind of depends on how many seeds you want. If you want plenty of non-seeded bud in addition to some seeds just pollinate a side branch fairly early on, before too many pistils form. They say you need at least 6 weeks from pollination for viable seeds to form, but idk because I let my plants ripen a long time. If you want as many seeds as possible, you could pollinate multiple times, or pollinate the whole plant once, leaving enough time for seeds to form.
 

Poontanger

Well-Known Member
Kind of depends on how many seeds you want. If you want plenty of non-seeded bud in addition to some seeds just pollinate a side branch fairly early on, before too many pistils form. They say you need at least 6 weeks from pollination for viable seeds to form, but idk because I let my plants ripen a long time. If you want as many seeds as possible, you could pollinate multiple times, or pollinate the whole plant once, leaving enough time for seeds to form.
Ok thx
But how many weeks after flip would you generally start pollination, 2 weeks, 3 weeks, or does it depend on The strain, or do you wait for the little white pistols
I'm sorry if this sounds dumb but it is all new to me
 
Top