CountryFriedPotHead
Well-Known Member
Hi all, Ive been here for a pretty short while now. Navigated forums isnt my strong suit but here I am making the attemp.
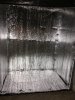
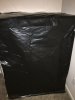
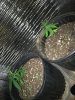
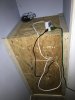
Im building a flower tent to serve me in my miniature perpetual. The girls are vegging under T8’s (Ive got a thread somewhere else about that, i don't know who may have seen it.) Ive used 1x3’s and some black poly. The new grow box size is 36” x 24” x 48”. I want to flower (2) girls at a time.
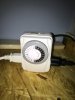
Il be using (2) 300w Galaxy Hydro LED lights, I have been told the true wattage is around 130w. For the carbon filter I have no yet purchased, but I am thinking of running the cheap vivosun fans ($17 on Amazon without a controller) and a vivosun Carbon Filter ($75). Does anyone have any insight as to if these fans and filter are worth a damn? Itd be greatly appreciated.
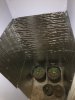
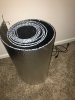
Il drop a picture from inside the empty box below. For any reptile enthusiast you will know what I mean when I say I will be using rat rubs for a drainage tray under the pots. Both girls will be in 3 gallon pots. (No Hydroponics Here sorry guys") )
)
Im thinking this box will work best if I use a SCROG. Il appreciate if the experienced growers will chime in even if the feedback is negative.
Thanks Guys Happy Tokes!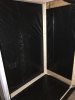

Im building a flower tent to serve me in my miniature perpetual. The girls are vegging under T8’s (Ive got a thread somewhere else about that, i don't know who may have seen it.) Ive used 1x3’s and some black poly. The new grow box size is 36” x 24” x 48”. I want to flower (2) girls at a time.
Il be using (2) 300w Galaxy Hydro LED lights, I have been told the true wattage is around 130w. For the carbon filter I have no yet purchased, but I am thinking of running the cheap vivosun fans ($17 on Amazon without a controller) and a vivosun Carbon Filter ($75). Does anyone have any insight as to if these fans and filter are worth a damn? Itd be greatly appreciated.
Il drop a picture from inside the empty box below. For any reptile enthusiast you will know what I mean when I say I will be using rat rubs for a drainage tray under the pots. Both girls will be in 3 gallon pots. (No Hydroponics Here sorry guys
Im thinking this box will work best if I use a SCROG. Il appreciate if the experienced growers will chime in even if the feedback is negative.
Thanks Guys