HalfBee
Well-Known Member
The Buck Driver Experience
Trying to build COB under $100
Earlier this month, Growmau5 mentioned in another thread
http://rollitup.org/t/best-cree-set-up-for-tiny-micro-grow.907799/
about using Buck drivers in a small space lighting situation.
He hinted at a possible video, but we know he's into the bigger stuff.
This is my proposed modular build – AS CHEAP AS POSSIBLE
I gave little consideration to the CREE chips except price and current (and availability of course)
Is backwards of all builds I've seen, in that, my power is majority of cost, whereas, those $40-50
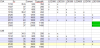
Parts:
$86.75 parts total
$110.45 (ship&tax bastards)
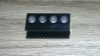
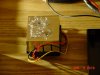
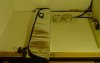
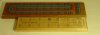
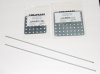
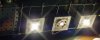
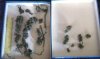
The chips were smaller than I expected, but have watched too many 3590 build videos.
You might notice there are 8 buck drivers but only 5 LEDs to run, that's just expansion
for future configurations.
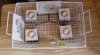
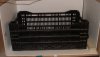
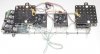
First configuration is full boards of same type of LDD, a 4x300H and 4x350H board
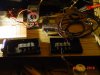
The LRS and LDD boards will be mounted outside the grow area.
Wiring it up with Cat5 solid 24AWG – 4 pairs – Solid + and Striped -
These boards can handle 700 or 1000 LDDs and the LSR-350-48 would let you add
some of the higher chips to fill out the current available. Since these boards daisy chain
you can keep adding Buck groups until you reach desired level of peak current.
3.3A available on 150-48
7.3A available on 350-48
Since each chip has it's own driver, the 24AWG should be enough even for 1A chips
since we're still only drawing 36v across a pair.
Why Cat5 – have a couple partial rolls of it on hand.
Also have interior Cat3 4-strand phone wire (also 24AWG solid copper)
Side project for the Tent People:
Why hang heavy lights from the ceiling (driver/heatsink/frame/etc)
Put them on the corner pvc poles.
I see clamp on fans, even oscillating ones, mounted this way.
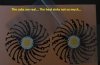
Take the fan off and mount your heatsink to the bracket.
Would you even need a center light?
How about a double or triple light at each corner.
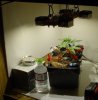
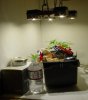
Wonder What 150 Watt
After watching all these LED grow videos, it's like walking down the purple canal streets in Amsterdam, looking into the bud porn windows and not being able to experience the live act (and coming away sticky and reeking of satisfaction)
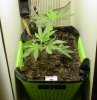
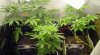
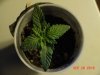
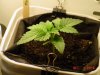
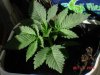
No genetics ATM but nice dispensary bag (and even J ) seeds to pop and I need to sex
and pheno them for mother/cloning etc... This should let me get them to show me what
I want to see before I spring for the good stuff...
CFL might be added but going to give it a fair shot first.
HalfBee
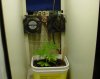
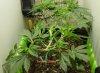
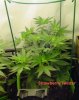
Sunlight not an option so we grow indoors
Canopy management, just one of our chores
Rig our netting one or two levels deep
Once flipped, upward those colas creep
Get them harvested then move in some mores
Trying to build COB under $100
Earlier this month, Growmau5 mentioned in another thread
http://rollitup.org/t/best-cree-set-up-for-tiny-micro-grow.907799/
about using Buck drivers in a small space lighting situation.
He hinted at a possible video, but we know he's into the bigger stuff.
This is my proposed modular build – AS CHEAP AS POSSIBLE
I gave little consideration to the CREE chips except price and current (and availability of course)
Is backwards of all builds I've seen, in that, my power is majority of cost, whereas, those $40-50
chips really make the grand total skyrocket.
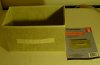
Parts:
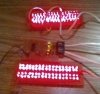
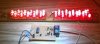
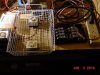
5x CXA1507 @ 3K for about $4 each /w holders $27.07
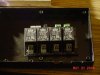
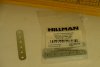
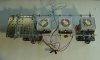
4x LDD-300H Buck drivers $4 each ($16)
4x LDD-350H Buck drivers $4 each ($16)
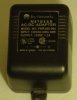
1x LRS-150-48 Meanwell ($20.20) $64.58
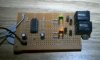
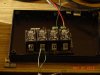
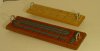
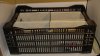
2x Coralux 4up LDD boards ($15 each but nice design) $35.34
4x LDD-300H Buck drivers $4 each ($16)
4x LDD-350H Buck drivers $4 each ($16)
1x LRS-150-48 Meanwell ($20.20) $64.58
Went with this driver because it was so cheap if budget was larger LRS-350-48 <$10 more
2x Coralux 4up LDD boards ($15 each but nice design) $35.34
$86.75 parts total
$110.45 (ship&tax bastards)
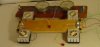
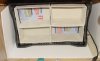
The chips were smaller than I expected, but have watched too many 3590 build videos.
You might notice there are 8 buck drivers but only 5 LEDs to run, that's just expansion
for future configurations.
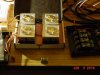
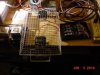
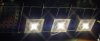
First configuration is full boards of same type of LDD, a 4x300H and 4x350H board
For Veg or early flower stage run 4x300 around the outside of square
with single 350 in the center
Late flower we simply swap the wires on the boards and get all 350s outsideand a softer 300 in middle to even out canopy coverage.
The LRS and LDD boards will be mounted outside the grow area.
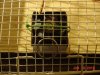
Wiring it up with Cat5 solid 24AWG – 4 pairs – Solid + and Striped -
4 pairs of terminals on each LDD board – sounds good to me
The 2nd Cat5 cable only has 1 pair used, can put 12v on a pair
The 2nd Cat5 cable only has 1 pair used, can put 12v on a pair
in that cable to power scrap pc heatsink fans
These boards can handle 700 or 1000 LDDs and the LSR-350-48 would let you add
some of the higher chips to fill out the current available. Since these boards daisy chain
you can keep adding Buck groups until you reach desired level of peak current.
3.3A available on 150-48
7.3A available on 350-48
Since each chip has it's own driver, the 24AWG should be enough even for 1A chips
since we're still only drawing 36v across a pair.
Why Cat5 – have a couple partial rolls of it on hand.
Also have interior Cat3 4-strand phone wire (also 24AWG solid copper)
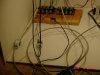
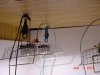
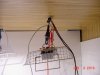
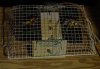
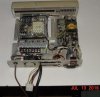
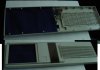
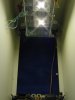
Side project for the Tent People:
Why hang heavy lights from the ceiling (driver/heatsink/frame/etc)
Put them on the corner pvc poles.
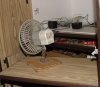
I see clamp on fans, even oscillating ones, mounted this way.
Take the fan off and mount your heatsink to the bracket.
The heatsink and light weigh little (less than that fan did)
Light orientation is directed inward avoiding a middle 'hot zone'
You can position each corner to correct canopy height so those
Light orientation is directed inward avoiding a middle 'hot zone'
You can position each corner to correct canopy height so those
stretchy ones and short bushes get optimal lighting.
Full height coverage from scrog level up to within inches of celing.Would you even need a center light?
How about a double or triple light at each corner.
4 pair wiring would let you handle 3 lights and a heatsink fan
or 2 lights, heatsink, and general air circulation fan.
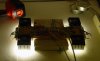
Wonder What 150 Watt
After watching all these LED grow videos, it's like walking down the purple canal streets in Amsterdam, looking into the bud porn windows and not being able to experience the live act (and coming away sticky and reeking of satisfaction)
No genetics ATM but nice dispensary bag (and even J ) seeds to pop and I need to sex
and pheno them for mother/cloning etc... This should let me get them to show me what
I want to see before I spring for the good stuff...
CFL might be added but going to give it a fair shot first.
HalfBee
Sunlight not an option so we grow indoors
Canopy management, just one of our chores
Rig our netting one or two levels deep
Once flipped, upward those colas creep
Get them harvested then move in some mores