OSBuds
Well-Known Member
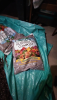
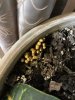
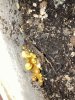
I am about out of Earth Worm Castings and was looking for
similar products to use.
Recharge is highly recommended here @ RIU.
Tractor Supply is now carrying:
Thrive Worm Castings Extract Liquid Concentrate Soil Conditioner for $20 Gallon:
Any recommendations on which is best & how to apply?
Or stay with buying earth worm castings? Thanks!
similar products to use.
Recharge is highly recommended here @ RIU.
Tractor Supply is now carrying:
Thrive Worm Castings Extract Liquid Concentrate Soil Conditioner for $20 Gallon:
Any recommendations on which is best & how to apply?
Or stay with buying earth worm castings? Thanks!