Hi slycog, you've saved me from bumping my own thread--I have more info to add. I'm flattered you like the light but I have too many things going on to produce these for others.
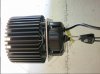
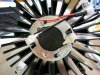
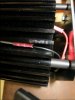
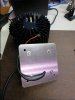
A safety note is the heatsink is not grounded (and there is no ground wire to the driver). I'm relying on "global luminary related safety regulation" certificates, I guess.
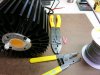
I bought enough materials to make a set of ten luminaires. So including shipping, each light cost about $110.
$27 for the MODULED GIGA 152100-B-HBG
https://www.cdiweb.c...atronix/574068/
http://www.cutter.co...hp?prod=cut2861
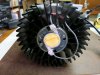
CXB3590-0000-000N0UBD30G (3000K 90CRI)
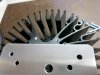
there was an ebay offer of ten pieces of 5 x 5 x 0.125" 5052 aluminum for $30 delivered.
http://www.ebay.com/...+5+x+5&_sacat=0
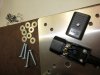
M5 x 20mm spacers:
https://www.grainger...OTAVAIL?smthumb$
M5 x 30mm machine screws work well with these.
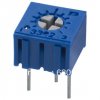
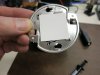
Wrong version is pictured of the HBG driver:
http://www.onlinecom...html?p=47854446
These are a great deal in my opinion, especially for a ten-pack @ $201. The case is plastic but seems sturdy. More efficient when run on 240V rather than 120V.
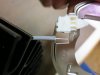
IEC power connector allows easy switching between 120 and 240VAC, this is the one for up to 14 AWG: Schurter 4735
http://www.mouser.co...ajuZ1fTPw%3d%3d
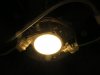
The HBG driver has a small rubber plug underneath that covers the PCB pot. My design is easy enough to disassemble for adjustment but the luminaire needs to be on a bench. The HBG-60-1400 dims down to 910mA so that's 65% of maximum.
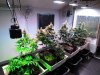
I've been adjusting mine for 56W from the wall so the COB sees about 50W. Hooked up to a Kill-a-Watt, the driver pulled from 25W to 65W. At 65W, the heatsink was quite warm.
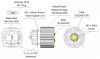
I'm very happy with the Fieldpiece ST4 temperature meter:
http://www.fieldpiec...l-temperature/. The Ideal holders need a corner cut out (with a small abrasive cutoff wheel) for access to the COB measurement point.
I read somewhere that 30 AWG thermocouple wire was preferred for this application so I bought some of these:
http://www.omega.com...5LSC_5SRTC.html
Cree recommends K type for their COBs except for the CXA(B)3590 where type T is preferred. Type T would require a different meter and I haven't seen a technical reason for using it on the bigger COBs.