ScaryGaryLed
Well-Known Member
So It's time for me to inform how to grow on the cheap well, as cheap as i could get into growing with LED and problems and the results... which is what people want.
Well I will post these picture first and edit them one at a time. as this might take sometime to inform everyone....

This here is the osram bulb led that I used, it was a 9W warm color 806 lumens, I also used 9w 800 lumen cool white color bulbs. At a ratio of 2/3 warm and 1/3 cool white. This worked great for veg, as the plants grew nice and fat and the additional red in the warm keeps them compact as much as the genetics of that seed would allow. It also gave them nice fat stems. i was really delighted about that as I really didn't have to worry about the plants falling over or anything like that. Later on I switched to cobs to finish the job. I was in a rush to order them so I'll go more into detail later on. Just a note, I had no Idea what a COB was until later on. Anyhow those bulbs are what I could get access to, it wasn't too cheap but it was not expensive and I'm sure they will last a long time and eventually replace the bulbs in my home

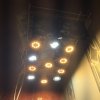
Here you can see how I put the Leds on the standard closet shelving. I used basic socket, CHEAP, and zip ties, CHEAP, ahd a standard 16 AWG power cord to link all the sockets up. IN the end it was a total of 14 bulbs 4 where cool white the rest warm. I'm sure this helped in the early stages to get the plants big.

That is how the setup ended out working, I guess really simple was the Idea to go with, I think anybody can use this setup in a tight sport and not really have to invest much money or time. it can easily be done with 1 trip to your local hardware store.

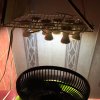
Here is a picture of the 2 sets of lamps. they are the same brand osram, with the little plastic covers off. This helps to focus the light downwards, honestly this is good idea, as those caps only keep the heat inside the leds anyhow in this purpose and focus the beams downwards not difuse them all over the place. They look pretty cool IMHO.

Here I would like to point out, that you can add some cheap computer fans and this helps cool the leds down. it's not necessary, but it does help reduce the temperature possibly also producing more light.

Just a picture so you get an idea how it was all wired up. I like the idea of using the rack also it allows for moving around the leds to focus them, slide them along the rails. and you can see the copious amount of zip ties. really simple

Progress and great growth. was happy about the situation at the moment. really no fuss setup. Space blanket mylar is your friend. as you can see the plants grow nicely under this light setup. I need to concentrate on use this setup or at least the use of 2/3 warm and 1/3 white. I think it really makes them happy.

That is how the spectrum looks like diffused through a crack. I thought that was pretty atristic and interesting, I can see why the plants like it.
Well, I hope this information helps those that interested in a basic setup, I will continue later on with an update, I have more pictures to show about this cycle.
Happy budding for now!


This is the begging...
smoke break.
Well I will post these picture first and edit them one at a time. as this might take sometime to inform everyone....

This here is the osram bulb led that I used, it was a 9W warm color 806 lumens, I also used 9w 800 lumen cool white color bulbs. At a ratio of 2/3 warm and 1/3 cool white. This worked great for veg, as the plants grew nice and fat and the additional red in the warm keeps them compact as much as the genetics of that seed would allow. It also gave them nice fat stems. i was really delighted about that as I really didn't have to worry about the plants falling over or anything like that. Later on I switched to cobs to finish the job. I was in a rush to order them so I'll go more into detail later on. Just a note, I had no Idea what a COB was until later on. Anyhow those bulbs are what I could get access to, it wasn't too cheap but it was not expensive and I'm sure they will last a long time and eventually replace the bulbs in my home

Here you can see how I put the Leds on the standard closet shelving. I used basic socket, CHEAP, and zip ties, CHEAP, ahd a standard 16 AWG power cord to link all the sockets up. IN the end it was a total of 14 bulbs 4 where cool white the rest warm. I'm sure this helped in the early stages to get the plants big.

That is how the setup ended out working, I guess really simple was the Idea to go with, I think anybody can use this setup in a tight sport and not really have to invest much money or time. it can easily be done with 1 trip to your local hardware store.

Here is a picture of the 2 sets of lamps. they are the same brand osram, with the little plastic covers off. This helps to focus the light downwards, honestly this is good idea, as those caps only keep the heat inside the leds anyhow in this purpose and focus the beams downwards not difuse them all over the place. They look pretty cool IMHO.


Here I would like to point out, that you can add some cheap computer fans and this helps cool the leds down. it's not necessary, but it does help reduce the temperature possibly also producing more light.

Just a picture so you get an idea how it was all wired up. I like the idea of using the rack also it allows for moving around the leds to focus them, slide them along the rails. and you can see the copious amount of zip ties. really simple

Progress and great growth. was happy about the situation at the moment. really no fuss setup. Space blanket mylar is your friend. as you can see the plants grow nicely under this light setup. I need to concentrate on use this setup or at least the use of 2/3 warm and 1/3 white. I think it really makes them happy.


That is how the spectrum looks like diffused through a crack. I thought that was pretty atristic and interesting, I can see why the plants like it.

Well, I hope this information helps those that interested in a basic setup, I will continue later on with an update, I have more pictures to show about this cycle.
Happy budding for now!


This is the begging...
smoke break.
Last edited:


